 |
Hacker News...
```
## Credentials
### access\_key
This parameter is used to authenticate API requests. It should be a string with a maximum length of 24 characters. Every request to the ScreenshotMAX API must include a valid `access_key`, which identifies the calling account. Example: `access_key=abcd1234efgh5678ijkl9012`.
### signature
This parameter is used to verify the authenticity of the request. It should be a string with a maximum length of 64 characters. The `signature` is generated using the `access_key` and your secret key, ensuring that the request has not been tampered with. Example: `signature=abcd1234efgh5678ijkl9012mnop3456`.
## Essential
### url
Defines the target webpage to capture. This parameter must be a valid URL.
You can pass the URL as either a plain string or a percent-encoded string.\
Use encoded format when the URL contains query parameters to avoid conflicts with the API's own querystring.
**Examples:**
* Plain: `url=https://www.example.com`
* Encoded: `url=https%3A%2F%2Fwww.example.com%3Fparam1%3Dvalue1%26param2%3Dvalue2`
### format
This parameter specifies the output format of the scraped content.
**Default value:** `html`
Example:\
`format=md`
Supported values:
| Format | Description |
| ------ | ----------------------------------- |
| `html` | Raw HTML content of the page |
| `md` | Markdown representation of the page |
### js\_enabled
This parameter indicates whether to enable JavaScript execution on the page. It is a boolean value with a default of `true`. When set to `true`, the API will execute JavaScript on the page before scraping.
## GPU
### gpu\_rendering
This parameter determines whether to enable GPU rendering for the webpage. It should be a boolean value, with a default of `false`. Enabling GPU rendering can improve the quality of the capture for complex webpages. Example: `gpu_rendering=true`.
## Viewport
This section describes the parameters used to control the viewport settings for captures. These parameters can help simulate different devices and screen sizes.
### capture\_beyond\_viewport
This parameter allows capturing content beyond the viewport. It is a boolean value with a default of `false`. When set to `true`, the API will capture content that is not currently visible in the viewport. Example: `capture_beyond_viewport=true`.
### viewport\_device
This parameter specifies the device type to simulate for the viewport.\
It should be a string that matches one of the supported device names.
Using this parameter allows the API to emulate different screen sizes and behaviors when capturing screenshots.
Example:\
`viewport_device=iphone_13`
The full list of supported devices is available via the `/devices` endpoint.\
[More information →](https://docs.screenshotmax.com/endpoints/devices)
### viewport\_width
This parameter sets the width of the viewport in pixels. It must be an integer greater than or equal to 0. Adjusting the viewport width can help capture screenshots that match specific screen sizes. Example: `viewport_width=1280`.
### viewport\_height
This parameter sets the height of the viewport in pixels. It must be an integer greater than or equal to 0. Adjusting the viewport height can help capture screenshots that match specific screen sizes. Example: `viewport_height=720`.
### viewport\_landscape
This parameter specifies whether the viewport should be in landscape mode. It is a boolean value. Setting this to `true` will change the orientation of the viewport. Example: `viewport_landscape=true`.
### viewport\_has\_touch
This parameter indicates whether the viewport has touch capabilities. It is a boolean value. This affects how the page is rendered and can be useful for mobile simulations. Example: `viewport_has_touch=true`.
### viewport\_mobile
This parameter indicates whether the viewport is a mobile device. It is a boolean value. Setting this to `true` will simulate a mobile device environment. Example: `viewport_mobile=true`.
### device\_scale\_factor
This parameter determines the device scale factor for the viewport. It should be a number between 1 and 5. This affects the pixel density of the screen. Example: `device_scale_factor=2`.
## Blocking
This section describes the parameters used to block certain elements or resources during the rendering process of the webpage. These parameters help enhance capture speed and content quality by removing unnecessary elements.
### block\_annoyance
This parameter specifies the type of annoyance to block during the capture.\
It should be a string that matches one of the supported values.
Default value: `cookies_banner`\
Example:\
`block_annoyance=ads`
Supported values:
| Value | Description |
| --------------- | -------------------------------------- |
| none | No blocking; capture the page as-is |
| ads | Block advertisements |
| tracking | Block tracking scripts and pixels |
| cookies\_banner | Block cookie consent banners (default) |
### block\_ressources
This parameter specifies the types of resources to block during the capture.\
It should be an array of strings that match the supported resource types.
Example:\
`block_ressources=image&block_ressources=stylesheet`
Supported resource types:
| Resource Type | Description |
| ------------- | --------------------------------------- |
| document | Main HTML documents |
| stylesheet | CSS stylesheets |
| image | Images (e.g., JPEG, PNG, SVG) |
| media | Audio and video files |
| font | Web fonts |
| script | JavaScript files |
| texttrack | Text tracks for media (e.g., subtitles) |
| xhr | XMLHttpRequests (AJAX calls) |
| fetch | Fetch API requests |
| eventsource | Server-Sent Events (SSE) |
| websocket | WebSocket connections |
| manifest | Web app manifests |
| other | Other types not explicitly listed above |
Use the `block_resources` option **to optimize scraping performance by preventing the loading of non-essential assets** such as images, fonts, and third-party scripts.
Blocking these resources reduces page load time, lowers bandwidth usage, and speeds up the overall scraping process—especially on media-heavy sites.
## Emulation
This section describes the parameters used to control the emulation behavior for captures. These parameters can help simulate different environments and conditions for capturing webpages.
### media\_type
This parameter specifies the media type for the webpage. It should be a string that matches either `screen` or `print`, with a default of `screen`. This affects how the page is rendered. Example: `media_type=print`.
## Customization
This section describes the parameters used to customize the capture process. These parameters can help tailor the capture to specific needs or preferences.
### hide\_selectors
This parameter specifies selectors to hide during the capture. It should be an array of strings. This can be useful for removing unwanted elements from the content. Example: `hide_selectors=.ad-banner&hide_selectors=.popup`.
### click\_selector
This parameter specifies a selector to click before taking the capture. It should be a string. This allows for interacting with the page before capturing. Example: `click_selector=.start-button`.
## Geolocation
The geolocation parameters allow you to simulate different geographical locations and conditions in your tests. This can be useful for testing location-based features or services.
### geolocation\_accuracy
This parameter sets the accuracy level for geolocation. It must be an integer between 0 and 1,000. This can help simulate different geolocation scenarios. Example: `geolocation_accuracy=200`.
### geolocation\_latitude
This parameter specifies the latitude for geolocation. It must be a number between -90 and 90. This allows for simulating different geographical locations. Example: `geolocation_latitude=37.7749`.
### geolocation\_longitude
This parameter specifies the longitude for geolocation. It must be a number between -180 and 180. This allows for simulating different geographical locations. Example: `geolocation_longitude=-122.4194`.
## Request
This section describes the parameters that can be used in the request to the API.
### timezone
his parameter specifies the time zone for the capture.\
It should be a string that matches one of the supported time zone names.
This helps simulate different local times during the capture process.\
Example:\
`timezone=America/Los_Angeles`
Supported values:
| Timezone |
| -------------------------------- |
| Africa/Abidjan |
| Africa/Accra |
| Africa/Addis\_Ababa |
| Africa/Algiers |
| Africa/Asmara |
| Africa/Bamako |
| Africa/Bangui |
| Africa/Banjul |
| Africa/Bissau |
| Africa/Blantyre |
| Africa/Brazzaville |
| Africa/Bujumbura |
| Africa/Cairo |
| Africa/Casablanca |
| Africa/Ceuta |
| Africa/Conakry |
| Africa/Dakar |
| Africa/Dar\_es\_Salaam |
| Africa/Djibouti |
| Africa/Douala |
| Africa/El\_Aaiun |
| Africa/Freetown |
| Africa/Gaborone |
| Africa/Harare |
| Africa/Johannesburg |
| Africa/Juba |
| Africa/Kampala |
| Africa/Khartoum |
| Africa/Kigali |
| Africa/Kinshasa |
| Africa/Lagos |
| Africa/Libreville |
| Africa/Lome |
| Africa/Luanda |
| Africa/Lubumbashi |
| Africa/Lusaka |
| Africa/Malabo |
| Africa/Maputo |
| Africa/Maseru |
| Africa/Mbabane |
| Africa/Mogadishu |
| Africa/Monrovia |
| Africa/Nairobi |
| Africa/Ndjamena |
| Africa/Niamey |
| Africa/Nouakchott |
| Africa/Ouagadougou |
| Africa/Porto-Novo |
| Africa/Sao\_Tome |
| Africa/Tripoli |
| Africa/Tunis |
| Africa/Windhoek |
| America/Adak |
| America/Anchorage |
| America/Anguilla |
| America/Antigua |
| America/Araguaina |
| America/Argentina/Buenos\_Aires |
| America/Argentina/Catamarca |
| America/Argentina/Cordoba |
| America/Argentina/Jujuy |
| America/Argentina/La\_Rioja |
| America/Argentina/Mendoza |
| America/Argentina/Rio\_Gallegos |
| America/Argentina/Salta |
| America/Argentina/San\_Juan |
| America/Argentina/San\_Luis |
| America/Argentina/Tucuman |
| America/Argentina/Ushuaia |
| America/Aruba |
| America/Asuncion |
| America/Atikokan |
| America/Bahia |
| America/Bahia\_Banderas |
| America/Barbados |
| America/Belem |
| America/Belize |
| America/Blanc-Sablon |
| America/Boa\_Vista |
| America/Bogota |
| America/Boise |
| America/Cambridge\_Bay |
| America/Campo\_Grande |
| America/Cancun |
| America/Caracas |
| America/Cayenne |
| America/Cayman |
| America/Chicago |
| America/Chihuahua |
| America/Ciudad\_Juarez |
| America/Costa\_Rica |
| America/Creston |
| America/Cuiaba |
| America/Curacao |
| America/Danmarkshavn |
| America/Dawson |
| America/Dawson\_Creek |
| America/Denver |
| America/Detroit |
| America/Dominica |
| America/Edmonton |
| America/Eirunepe |
| America/El\_Salvador |
| America/Fort\_Nelson |
| America/Fortaleza |
| America/Glace\_Bay |
| America/Goose\_Bay |
| America/Grand\_Turk |
| America/Grenada |
| America/Guadeloupe |
| America/Guatemala |
| America/Guayaquil |
| America/Guyana |
| America/Halifax |
| America/Havana |
| America/Hermosillo |
| America/Indiana/Indianapolis |
| America/Indiana/Knox |
| America/Indiana/Marengo |
| America/Indiana/Petersburg |
| America/Indiana/Tell\_City |
| America/Indiana/Vevay |
| America/Indiana/Vincennes |
| America/Indiana/Winamac |
| America/Inuvik |
| America/Iqaluit |
| America/Jamaica |
| America/Juneau |
| America/Kentucky/Louisville |
| America/Kentucky/Monticello |
| America/Kralendijk |
| America/La\_Paz |
| America/Lima |
| America/Los\_Angeles |
| America/Lower\_Princes |
| America/Maceio |
| America/Managua |
| America/Manaus |
| America/Marigot |
| America/Martinique |
| America/Matamoros |
| America/Mazatlan |
| America/Menominee |
| America/Merida |
| America/Metlakatla |
| America/Mexico\_City |
| America/Miquelon |
| America/Moncton |
| America/Monterrey |
| America/Montevideo |
| America/Montserrat |
| America/Nassau |
| America/New\_York |
| America/Nome |
| America/Noronha |
| America/North\_Dakota/Beulah |
| America/North\_Dakota/Center |
| America/North\_Dakota/New\_Salem |
| America/Nuuk |
| America/Ojinaga |
| America/Panama |
| America/Paramaribo |
| America/Phoenix |
| America/Port-au-Prince |
| America/Port\_of\_Spain |
| America/Porto\_Velho |
| America/Puerto\_Rico |
| America/Punta\_Arenas |
| America/Rankin\_Inlet |
| America/Recife |
| America/Regina |
| America/Resolute |
| America/Rio\_Branco |
| America/Santarem |
| America/Santiago |
| America/Santo\_Domingo |
| America/Sao\_Paulo |
| America/Scoresbysund |
| America/Sitka |
| America/St\_Barthelemy |
| America/St\_Johns |
| America/St\_Kitts |
| America/St\_Lucia |
| America/St\_Thomas |
| America/St\_Vincent |
| America/Swift\_Current |
| America/Tegucigalpa |
| America/Thule |
| America/Tijuana |
| America/Toronto |
| America/Tortola |
| America/Vancouver |
| America/Whitehorse |
| America/Winnipeg |
| America/Yakutat |
| America/Yellowknife |
| Antarctica/Casey |
| Antarctica/Davis |
| Antarctica/DumontDUrville |
| Antarctica/Macquarie |
| Antarctica/Mawson |
| Antarctica/McMurdo |
| Antarctica/Palmer |
| Antarctica/Rothera |
| Antarctica/Syowa |
| Antarctica/Troll |
| Antarctica/Vostok |
| Arctic/Longyearbyen |
| Asia/Aden |
| Asia/Almaty |
| Asia/Amman |
| Asia/Anadyr |
| Asia/Aqtau |
| Asia/Aqtobe |
| Asia/Ashgabat |
| Asia/Atyrau |
| Asia/Baghdad |
| Asia/Bahrain |
| Asia/Baku |
| Asia/Bangkok |
| Asia/Barnaul |
| Asia/Beirut |
| Asia/Bishkek |
| Asia/Brunei |
| Asia/Chita |
| Asia/Choibalsan |
| Asia/Colombo |
| Asia/Damascus |
| Asia/Dhaka |
| Asia/Dili |
| Asia/Dubai |
| Asia/Dushanbe |
| Asia/Famagusta |
| Asia/Gaza |
| Asia/Hebron |
| Asia/Ho\_Chi\_Minh |
| Asia/Hong\_Kong |
| Asia/Hovd |
| Asia/Irkutsk |
| Asia/Jakarta |
| Asia/Jayapura |
| Asia/Jerusalem |
| Asia/Kabul |
| Asia/Kamchatka |
| Asia/Karachi |
| Asia/Kathmandu |
| Asia/Khandyga |
| Asia/Kolkata |
| Asia/Krasnoyarsk |
| Asia/Kuala\_Lumpur |
| Asia/Kuching |
| Asia/Kuwait |
| Asia/Macau |
| Asia/Magadan |
| Asia/Makassar |
| Asia/Manila |
| Asia/Muscat |
| Asia/Nicosia |
| Asia/Novokuznetsk |
| Asia/Novosibirsk |
| Asia/Omsk |
| Asia/Oral |
| Asia/Phnom\_Penh |
| Asia/Pontianak |
| Asia/Pyongyang |
| Asia/Qatar |
| Asia/Qostanay |
| Asia/Qyzylorda |
| Asia/Riyadh |
| Asia/Sakhalin |
| Asia/Samarkand |
| Asia/Seoul |
| Asia/Shanghai |
| Asia/Singapore |
| Asia/Srednekolymsk |
| Asia/Taipei |
| Asia/Tashkent |
| Asia/Tbilisi |
| Asia/Tehran |
| Asia/Thimphu |
| Asia/Tokyo |
| Asia/Tomsk |
| Asia/Ulaanbaatar |
| Asia/Urumqi |
| Asia/Ust-Nera |
| Asia/Vientiane |
| Asia/Vladivostok |
| Asia/Yakutsk |
| Asia/Yangon |
| Asia/Yekaterinburg |
| Asia/Yerevan |
| Atlantic/Azores |
| Atlantic/Bermuda |
| Atlantic/Canary |
| Atlantic/Cape\_Verde |
| Atlantic/Faroe |
| Atlantic/Madeira |
| Atlantic/Reykjavik |
| Atlantic/South\_Georgia |
| Atlantic/St\_Helena |
| Atlantic/Stanley |
| Australia/Adelaide |
| Australia/Brisbane |
| Australia/Broken\_Hill |
| Australia/Darwin |
| Australia/Eucla |
| Australia/Hobart |
| Australia/Lindeman |
| Australia/Lord\_Howe |
| Australia/Melbourne |
| Australia/Perth |
| Australia/Sydney |
| Europe/Amsterdam |
| Europe/Andorra |
| Europe/Astrakhan |
| Europe/Athens |
| Europe/Belgrade |
| Europe/Berlin |
| Europe/Bratislava |
| Europe/Brussels |
| Europe/Bucharest |
| Europe/Budapest |
| Europe/Busingen |
| Europe/Chisinau |
| Europe/Copenhagen |
| Europe/Dublin |
| Europe/Gibraltar |
| Europe/Guernsey |
| Europe/Helsinki |
| Europe/Isle\_of\_Man |
| Europe/Istanbul |
| Europe/Jersey |
| Europe/Kaliningrad |
| Europe/Kirov |
| Europe/Kyiv |
| Europe/Lisbon |
| Europe/Ljubljana |
| Europe/London |
| Europe/Luxembourg |
| Europe/Madrid |
| Europe/Malta |
| Europe/Mariehamn |
| Europe/Minsk |
| Europe/Monaco |
| Europe/Moscow |
| Europe/Oslo |
| Europe/Paris |
| Europe/Podgorica |
| Europe/Prague |
| Europe/Riga |
| Europe/Rome |
| Europe/Samara |
| Europe/San\_Marino |
| Europe/Sarajevo |
| Europe/Saratov |
| Europe/Simferopol |
| Europe/Skopje |
| Europe/Sofia |
| Europe/Stockholm |
| Europe/Tallinn |
| Europe/Tirane |
| Europe/Ulyanovsk |
| Europe/Vaduz |
| Europe/Vatican |
| Europe/Vienna |
| Europe/Vilnius |
| Europe/Volgograd |
| Europe/Warsaw |
| Europe/Zagreb |
| Europe/Zurich |
| Indian/Antananarivo |
| Indian/Chagos |
| Indian/Christmas |
| Indian/Cocos |
| Indian/Comoro |
| Indian/Kerguelen |
| Indian/Mahe |
| Indian/Maldives |
| Indian/Mauritius |
| Indian/Mayotte |
| Indian/Reunion |
| Pacific/Apia |
| Pacific/Auckland |
| Pacific/Bougainville |
| Pacific/Chatham |
| Pacific/Chuuk |
| Pacific/Easter |
| Pacific/Efate |
| Pacific/Fakaofo |
| Pacific/Fiji |
| Pacific/Funafuti |
| Pacific/Galapagos |
| Pacific/Gambier |
| Pacific/Guadalcanal |
| Pacific/Guam |
| Pacific/Honolulu |
| Pacific/Kanton |
| Pacific/Kiritimati |
| Pacific/Kosrae |
| Pacific/Kwajalein |
| Pacific/Majuro |
| Pacific/Marquesas |
| Pacific/Midway |
| Pacific/Nauru |
| Pacific/Niue |
| Pacific/Norfolk |
| Pacific/Noumea |
| Pacific/Pago\_Pago |
| Pacific/Palau |
| Pacific/Pitcairn |
| Pacific/Pohnpei |
| Pacific/Port\_Moresby |
| Pacific/Rarotonga |
| Pacific/Saipan |
| Pacific/Tahiti |
| Pacific/Tarawa |
| Pacific/Tongatapu |
| Pacific/Wake |
| Pacific/Wallis |
### authorization
Specifies the authorization token to include with the API request, typically used to access protected resources.\
This should be a string encoded in Base64 and passed as the value of the `Authorization` header.
**Example:** `authorization=`
**Note:** Ensure the token is properly encoded to avoid authentication errors. Common formats include Basic Auth (`username:password`) or Bearer tokens, depending on the target service.
### attachment\_name
This parameter specifies the name of the attachment for the result. It should be a string without the extension. The extension will be computed from the response. This can be useful for identifying the screenshot in a list of attachments. Example: `attachment_name=screenshot`.
### user\_agent
This parameter specifies the user agent string to use for the request. It should be a string. This allows for simulating different browsers or devices. Example: `user_agent=Mozilla/5.0 (Windows NT 10.0; Win64; x64) AppleWebKit/537.36 (KHTML, like Gecko) Chrome/58.0.3029.110 Safari/537.3`.
### cookies
This parameter allows for specifying cookies to include in the request. It should be an array of strings. This can be useful for maintaining session state. Example: `cookies=session_id=abc123&cookies=user_id=xyz789`.
### headers
This parameter allows for specifying additional headers to include in the request. It should be an array of strings. This can be useful for passing custom headers. Example: `headers=X-Custom-Header:value`.
### ip\_location
This parameter specifies the IP location to simulate. It should be a string that matches one of the supported values.
Example:\
`ip_location=us`
Supported values:
| Country Code | Country |
| ------------ | ---------------------------------- |
| us | United States |
| cn | China |
| eu | European Union (random EU country) |
| ca | Canada |
| mx | Mexico |
| gb | United Kingdom |
| de | Germany |
| fr | France |
| ch | Switzerland |
| in | India |
| jp | Japan |
| kr | South Korea |
| ru | Russia |
| br | Brazil |
| au | Australia |
### bypass\_csp
This parameter indicates whether to bypass Content Security Policy during the capture. It is a boolean value with a default of `false`. This can be useful for testing pages with strict CSP. Example: `bypass_csp=true`.
### proxy
This parameter specifies a proxy server to use for the request. It should be a string in URI format. This can be useful for routing requests through a specific server. Example: `proxy=http://proxy.example.com:8080`.
## Wait
This section describes the parameters that can be used to control the timing of the capture process.
### delay
This parameter sets a delay in seconds before taking the capture. It must be an integer between 0 and 30, with a default of 0. This can help ensure that the page is fully loaded before capturing. Example: `delay=5`.
### timeout
This parameter sets a timeout in seconds for the request. It must be an integer between 0 and 30, with a default of 30. This can help prevent long waits for unresponsive pages. Example: `timeout=10`.
### wait\_until
This parameter specifies the events to wait for before taking the capture.\
It should be an array of strings that match one of the supported events.\
Default is `domcontentloaded`.
Example: `wait_until=load&wait_until=networkidle0`
| Event | Description |
| ------------------ | ------------------------------------------------------------------------------------------------- |
| `load` | Waits for the `load` event to fire (all resources including images and scripts). |
| `domcontentloaded` | Waits for the DOMContentLoaded event (when the initial HTML document is fully loaded and parsed). |
| `networkidle0` | Waits until there are no more than 0 network connections for at least 500 ms. |
| `networkidle2` | Waits until there are no more than 2 network connections for at least 500 ms. |
## Metadata
The metadata parameters allow you to include additional information in the capture request. This can be useful for debugging, analysis, or simply to provide more context about the captured content.
### metadata\_icon
This parameter indicates whether to include the website's icon (favicon) in the metadata. It is a boolean value with a default of `false`. Example: `metadata_icon=true`.
If enabled, the response headers will include: `X-Screenshotmax-Metadata-Icon` — the URL path to the favicon of the target webpage.
### metadata\_fonts
This parameter indicates whether to include font information in the metadata. It is a boolean value with a default of `false`. This can be useful for analyzing the fonts used on the webpage. Example: `metadata_fonts=true`.
If enabled, the response headers will include: `X-Screenshotmax-Metadata-Fonts` — a comma-separated list of fonts used on the page.
### metadata\_title
This parameter indicates whether to include the page title in the metadata. It is a boolean value with a default of `false`. Example: `metadata_title=true`.
If enabled, the response headers will include: `X-Screenshotmax-Metadata-Title` — the `` of the target webpage.
### metadata\_status
This parameter indicates whether to include the HTTP status in the metadata. It is a boolean value with a default of `false`. This can be useful for understanding the response status of the request. Example: `metadata_status=true`.
If enabled, the response headers will include: `X-Screenshotmax-Metadata-Status` — the HTTP status code of the response.
### metadata\_headers
This parameter indicates whether to include the response headers in the metadata. It is a boolean value with a default of `false`. This can help in analyzing the headers returned by the server. Example: `metadata_headers=true`.
If enabled, the response headers will include: `X-Screenshotmax-Metadata-Headers` — a JSON string of all response headers from the target webpage.
### metadata\_hash
This parameter indicates whether to include a hash of the captured content in the metadata. It is a boolean value with a default of `false`. Example: `metadata_hash=true`.
If enabled, the response headers will include: `X-Screenshotmax-Metadata-Hash` — a SHA-256 hash of the webpage content, useful for change detection.
## Caching
This section outlines the parameters available to configure caching behavior for content responses in API requests.
Captured content can be stored in the cache for a specified duration, enabling faster retrieval of previously processed results.
This helps reduce load times and improve performance for frequently accessed content.
Cached content is accessible via a URL in the following format:
[https://cache.screenshotmax.com/\{hash}.\{ext}](https://cache.screenshotmax.com/\{hash}.\{ext})
In the response headers, the key `X-Screenshotmax-Cache-Url` provides the direct URL to the cached version of the content.
### cache
This parameter indicates whether to enable caching for the result. It is a boolean value with a default of `false`. Example: `cache=true`.
### cache\_ttl
This parameter sets the time-to-live for cached result in seconds. It must be an integer between 1 and 2,592,000 (30 days), with a default of 604,800 (7 days). This controls how long cached results are kept. Example: `cache_ttl=86400`.
## Async and Webhook
This section outlines the parameters used for asynchronous processing and webhook notifications in API requests.
### async
This parameter indicates whether the request should be processed asynchronously. It is a boolean value with a default of `false`. This can be useful for handling long-running requests without blocking. Example: `async=true`.
### webhook\_url
This parameter specifies a webhook URL to send notifications to when the request is completed. It should be a string in URI format.
The webhook URL muste support POST requests and be publicly accessible. Example: `webhook_url=https://example.com/webhook`.
### webhook\_signed
This parameter indicates whether the webhook should be signed for security. It is a boolean value with a default of `true`. This can help ensure that notifications are from a trusted source. Example: `webhook_signed=false`.
The signature is a SHA-256 hash of the request body combined with your secret key. It ensures the authenticity of the notification and protects against tampering.
For details on how to verify the signature, refer to the [signed requests documentation](https://docs.screenshotmax.com/guides/start/signed-requests).
# Animated Screenshot Options
Source: https://docs.screenshotmax.com/guides/references/screencast-options
Customize animated screenshot generation with ScreenshotMAX API
<Frame caption="Example of https://www.apple.com/apple-watch-ultra-2 animated screenshot">
<video loop autoPlay muted playsInline src="https://screenshotmax.com/static/media/screencasts/apple-ultra-2-scroll.webm" className="w-full aspect-video" />
</Frame>
## Animated Screenshots Options
The Screencast API offers a range of options to customize how animated screenshots are generated.
You can control various aspects of the recording, such as the format, duration, scrolling behavior, and more.
For a complete overview, visit the [Animated Screenshots guide](https://docs.screenshotmax.com/guides/start/animated-screenshots).
## Credentials
### access\_key
This parameter is used to authenticate API requests. It should be a string with a maximum length of 24 characters. Every request to the ScreenshotMAX API must include a valid `access_key`, which identifies the calling account. Example: `access_key=abcd1234efgh5678ijkl9012`.
### signature
This parameter is used to verify the authenticity of the request. It should be a string with a maximum length of 64 characters. The `signature` is generated using the `access_key` and your secret key, ensuring that the request has not been tampered with. Example: `signature=abcd1234efgh5678ijkl9012mnop3456`.
## Essential
### url
Defines the target webpage to capture. This parameter must be a valid URL.
You can pass the URL as either a plain string or a percent-encoded string.\
Use encoded format when the URL contains query parameters to avoid conflicts with the API's own querystring.
**Examples:**
* Plain: `url=https://www.example.com`
* Encoded: `url=https%3A%2F%2Fwww.example.com%3Fparam1%3Dvalue1%26param2%3Dvalue2`
### format
This parameter specifies the output format of the animated screenshot video.\
It should be a string that matches one of the supported values.
**Default value:** `mp4`
Example:\
`format=webm`
Supported values:
| Value | Description |
| ----- | -------------------------- |
| webm | WebM video format |
| mp4 | MP4 video format (default) |
| mov | QuickTime MOV format |
| avi | AVI video format |
### duration
This parameter specifies the duration of the animated screenshot in seconds. It is an integer value between `1` and `30`, with a default value of `5`. Example: `duration=10`.
### scenario
This parameter specifies the scenario for the animated screenshot. It can be either `video` or `scroll`. The default value is `video`. Example: `scenario=scroll`.
### scroll\_by\_amount
This parameter specifies the amount to scroll the page when capturing a full-page screenshot. It is an integer value that represents the number of pixels to scroll. The default value is `1000`.
### scroll\_by\_delay
This parameter specifies the delay between scroll actions in milliseconds. It is an integer value that represents the time to wait before scrolling again. The default value is `500`.
### scroll\_by\_duration
This parameter specifies the duration of the scroll when capturing a full-page screenshot. It is an integer value that represents the time in milliseconds to wait before scrolling again. The default value is `1500`.
### scroll\_back
This parameter indicates whether to scroll back to the top of the page after capturing the animated screenshot. It is a boolean value with a default of `true`. When set to `true`, the API scrolls back to the top of the page after capturing the screenshot.
### scroll\_back\_delay
This parameter specifies the delay before scrolling back to the top of the page in milliseconds. It is an integer value that represents the time to wait before scrolling back. The default value is `800`.
### scroll\_easing
This parameter specifies the easing function to use for the scroll animation.\
It should be a string that matches one of the supported values.
**Default value:** `linear`\
Example:\
`scroll_easing="ease_in_out_cubic"`
Supported values:
| Value | Description |
| -------------------- | ------------------------------------ |
| linear | Constant scroll speed (default) |
| ease\_in\_quad | Accelerates from zero velocity |
| ease\_out\_quad | Decelerates to zero velocity |
| ease\_in\_out\_quad | Accelerates, then decelerates |
| ease\_in\_cubic | Stronger acceleration at the start |
| ease\_out\_cubic | Stronger deceleration at the end |
| ease\_in\_out\_cubic | Smooth acceleration and deceleration |
| ease\_in\_quart | Even stronger start acceleration |
| ease\_out\_quart | Even stronger end deceleration |
| ease\_in\_out\_quart | Balanced quartic easing |
| ease\_in\_quint | Fastest acceleration at the start |
| ease\_out\_quint | Fastest deceleration at the end |
| ease\_in\_out\_quint | Fast acceleration and deceleration |
## GPU
### gpu\_rendering
This parameter determines whether to enable GPU rendering for the webpage. It should be a boolean value, with a default of `false`. Enabling GPU rendering can improve the quality of the capture for complex webpages. Example: `gpu_rendering=true`.
## Viewport
This section describes the parameters used to control the viewport settings for captures. These parameters can help simulate different devices and screen sizes.
### capture\_beyond\_viewport
This parameter allows capturing content beyond the viewport. It is a boolean value with a default of `false`. When set to `true`, the API will capture content that is not currently visible in the viewport. Example: `capture_beyond_viewport=true`.
### viewport\_device
This parameter specifies the device type to simulate for the viewport.\
It should be a string that matches one of the supported device names.
Using this parameter allows the API to emulate different screen sizes and behaviors when capturing screenshots.
Example:\
`viewport_device=iphone_13`
The full list of supported devices is available via the `/devices` endpoint.\
[More information →](https://docs.screenshotmax.com/endpoints/devices)
### viewport\_width
This parameter sets the width of the viewport in pixels. It must be an integer greater than or equal to 0. Adjusting the viewport width can help capture screenshots that match specific screen sizes. Example: `viewport_width=1280`.
### viewport\_height
This parameter sets the height of the viewport in pixels. It must be an integer greater than or equal to 0. Adjusting the viewport height can help capture screenshots that match specific screen sizes. Example: `viewport_height=720`.
### viewport\_landscape
This parameter specifies whether the viewport should be in landscape mode. It is a boolean value. Setting this to `true` will change the orientation of the viewport. Example: `viewport_landscape=true`.
### viewport\_has\_touch
This parameter indicates whether the viewport has touch capabilities. It is a boolean value. This affects how the page is rendered and can be useful for mobile simulations. Example: `viewport_has_touch=true`.
### viewport\_mobile
This parameter indicates whether the viewport is a mobile device. It is a boolean value. Setting this to `true` will simulate a mobile device environment. Example: `viewport_mobile=true`.
### device\_scale\_factor
This parameter determines the device scale factor for the viewport. It should be a number between 1 and 5. This affects the pixel density of the screen. Example: `device_scale_factor=2`.
## Clip
This section explains the clipping parameters used to define which parts of a webpage are captured.
### clip\_x
This parameter specifies the x-coordinate of the clipped area. It must be an integer greater than or equal to 0. This allows for capturing a specific area of the page. Example: `clip_x=100`.
### clip\_y
This parameter specifies the y-coordinate of the clipped area. It must be an integer greater than or equal to 0. This allows for capturing a specific area of the page. Example: `clip_y=100`.
### clip\_width
This parameter sets the width of the clipped area. It must be an integer greater than or equal to 0. This allows for capturing a specific area of the page. Example: `clip_width=800`.
### clip\_height
This parameter sets the height of the clipped area. It must be an integer greater than or equal to 0. This allows for capturing a specific area of the page. Example: `clip_height=600`.
## Blocking
This section describes the parameters used to block certain elements or resources during the rendering process of the webpage. These parameters help enhance capture speed and content quality by removing unnecessary elements.
### block\_annoyance
This parameter specifies the type of annoyance to block during the capture.\
It should be a string that matches one of the supported values.
Default value: `cookies_banner`\
Example:\
`block_annoyance=ads`
Supported values:
| Value | Description |
| --------------- | -------------------------------------- |
| none | No blocking; capture the page as-is |
| ads | Block advertisements |
| tracking | Block tracking scripts and pixels |
| cookies\_banner | Block cookie consent banners (default) |
### block\_ressources
This parameter specifies the types of resources to block during the capture.\
It should be an array of strings that match the supported resource types.
Example:\
`block_ressources=image&block_ressources=stylesheet`
Supported resource types:
| Resource Type | Description |
| ------------- | --------------------------------------- |
| document | Main HTML documents |
| stylesheet | CSS stylesheets |
| image | Images (e.g., JPEG, PNG, SVG) |
| media | Audio and video files |
| font | Web fonts |
| script | JavaScript files |
| texttrack | Text tracks for media (e.g., subtitles) |
| xhr | XMLHttpRequests (AJAX calls) |
| fetch | Fetch API requests |
| eventsource | Server-Sent Events (SSE) |
| websocket | WebSocket connections |
| manifest | Web app manifests |
| other | Other types not explicitly listed above |
## Emulation
This section describes the parameters used to control the emulation behavior for captures. These parameters can help simulate different environments and conditions for capturing webpages.
### media\_type
This parameter specifies the media type for the webpage. It should be a string that matches either `screen` or `print`, with a default of `screen`. This affects how the page is rendered. Example: `media_type=print`.
### vision\_deficiency
This parameter indicates the type of vision deficiency to simulate.\
It should be a string that matches one of the supported values.
This can help test accessibility and ensure your content is perceivable by users with visual impairments.
Example:\
`vision_deficiency=deuteranopia`
Supported values:
| Value | Description |
| ----------------- | -------------------------------------- |
| achromatopsia | Complete color blindness |
| deuteranopia | Red-green color blindness (green-weak) |
| blurred\_vision | Simulates blurred vision |
| reduced\_contrast | Simulates reduced contrast sensitivity |
### dark\_mode
This parameter indicates whether to enable dark mode for the webpage. It is a boolean value with a default of `false`. When set to `true`, the screenshot will render in dark mode. Example: `dark_mode=true`.
### reduced\_motion
This parameter indicates whether to reduce motion effects in the webpage. It is a boolean value with a default of `false`. This can be helpful for accessibility purposes. Example: `reduced_motion=true`.
## Customization
This section describes the parameters used to customize the capture process. These parameters can help tailor the capture to specific needs or preferences.
### hide\_selectors
This parameter specifies selectors to hide during the capture. It should be an array of strings. This can be useful for removing unwanted elements from the content. Example: `hide_selectors=.ad-banner&hide_selectors=.popup`.
### click\_selector
This parameter specifies a selector to click before taking the capture. It should be a string. This allows for interacting with the page before capturing. Example: `click_selector=.start-button`.
## Geolocation
The geolocation parameters allow you to simulate different geographical locations and conditions in your tests. This can be useful for testing location-based features or services.
### geolocation\_accuracy
This parameter sets the accuracy level for geolocation. It must be an integer between 0 and 1,000. This can help simulate different geolocation scenarios. Example: `geolocation_accuracy=200`.
### geolocation\_latitude
This parameter specifies the latitude for geolocation. It must be a number between -90 and 90. This allows for simulating different geographical locations. Example: `geolocation_latitude=37.7749`.
### geolocation\_longitude
This parameter specifies the longitude for geolocation. It must be a number between -180 and 180. This allows for simulating different geographical locations. Example: `geolocation_longitude=-122.4194`.
## Request
This section describes the parameters that can be used in the request to the API.
### timezone
his parameter specifies the time zone for the capture.\
It should be a string that matches one of the supported time zone names.
This helps simulate different local times during the capture process.\
Example:\
`timezone=America/Los_Angeles`
Supported values:
| Timezone |
| -------------------------------- |
| Africa/Abidjan |
| Africa/Accra |
| Africa/Addis\_Ababa |
| Africa/Algiers |
| Africa/Asmara |
| Africa/Bamako |
| Africa/Bangui |
| Africa/Banjul |
| Africa/Bissau |
| Africa/Blantyre |
| Africa/Brazzaville |
| Africa/Bujumbura |
| Africa/Cairo |
| Africa/Casablanca |
| Africa/Ceuta |
| Africa/Conakry |
| Africa/Dakar |
| Africa/Dar\_es\_Salaam |
| Africa/Djibouti |
| Africa/Douala |
| Africa/El\_Aaiun |
| Africa/Freetown |
| Africa/Gaborone |
| Africa/Harare |
| Africa/Johannesburg |
| Africa/Juba |
| Africa/Kampala |
| Africa/Khartoum |
| Africa/Kigali |
| Africa/Kinshasa |
| Africa/Lagos |
| Africa/Libreville |
| Africa/Lome |
| Africa/Luanda |
| Africa/Lubumbashi |
| Africa/Lusaka |
| Africa/Malabo |
| Africa/Maputo |
| Africa/Maseru |
| Africa/Mbabane |
| Africa/Mogadishu |
| Africa/Monrovia |
| Africa/Nairobi |
| Africa/Ndjamena |
| Africa/Niamey |
| Africa/Nouakchott |
| Africa/Ouagadougou |
| Africa/Porto-Novo |
| Africa/Sao\_Tome |
| Africa/Tripoli |
| Africa/Tunis |
| Africa/Windhoek |
| America/Adak |
| America/Anchorage |
| America/Anguilla |
| America/Antigua |
| America/Araguaina |
| America/Argentina/Buenos\_Aires |
| America/Argentina/Catamarca |
| America/Argentina/Cordoba |
| America/Argentina/Jujuy |
| America/Argentina/La\_Rioja |
| America/Argentina/Mendoza |
| America/Argentina/Rio\_Gallegos |
| America/Argentina/Salta |
| America/Argentina/San\_Juan |
| America/Argentina/San\_Luis |
| America/Argentina/Tucuman |
| America/Argentina/Ushuaia |
| America/Aruba |
| America/Asuncion |
| America/Atikokan |
| America/Bahia |
| America/Bahia\_Banderas |
| America/Barbados |
| America/Belem |
| America/Belize |
| America/Blanc-Sablon |
| America/Boa\_Vista |
| America/Bogota |
| America/Boise |
| America/Cambridge\_Bay |
| America/Campo\_Grande |
| America/Cancun |
| America/Caracas |
| America/Cayenne |
| America/Cayman |
| America/Chicago |
| America/Chihuahua |
| America/Ciudad\_Juarez |
| America/Costa\_Rica |
| America/Creston |
| America/Cuiaba |
| America/Curacao |
| America/Danmarkshavn |
| America/Dawson |
| America/Dawson\_Creek |
| America/Denver |
| America/Detroit |
| America/Dominica |
| America/Edmonton |
| America/Eirunepe |
| America/El\_Salvador |
| America/Fort\_Nelson |
| America/Fortaleza |
| America/Glace\_Bay |
| America/Goose\_Bay |
| America/Grand\_Turk |
| America/Grenada |
| America/Guadeloupe |
| America/Guatemala |
| America/Guayaquil |
| America/Guyana |
| America/Halifax |
| America/Havana |
| America/Hermosillo |
| America/Indiana/Indianapolis |
| America/Indiana/Knox |
| America/Indiana/Marengo |
| America/Indiana/Petersburg |
| America/Indiana/Tell\_City |
| America/Indiana/Vevay |
| America/Indiana/Vincennes |
| America/Indiana/Winamac |
| America/Inuvik |
| America/Iqaluit |
| America/Jamaica |
| America/Juneau |
| America/Kentucky/Louisville |
| America/Kentucky/Monticello |
| America/Kralendijk |
| America/La\_Paz |
| America/Lima |
| America/Los\_Angeles |
| America/Lower\_Princes |
| America/Maceio |
| America/Managua |
| America/Manaus |
| America/Marigot |
| America/Martinique |
| America/Matamoros |
| America/Mazatlan |
| America/Menominee |
| America/Merida |
| America/Metlakatla |
| America/Mexico\_City |
| America/Miquelon |
| America/Moncton |
| America/Monterrey |
| America/Montevideo |
| America/Montserrat |
| America/Nassau |
| America/New\_York |
| America/Nome |
| America/Noronha |
| America/North\_Dakota/Beulah |
| America/North\_Dakota/Center |
| America/North\_Dakota/New\_Salem |
| America/Nuuk |
| America/Ojinaga |
| America/Panama |
| America/Paramaribo |
| America/Phoenix |
| America/Port-au-Prince |
| America/Port\_of\_Spain |
| America/Porto\_Velho |
| America/Puerto\_Rico |
| America/Punta\_Arenas |
| America/Rankin\_Inlet |
| America/Recife |
| America/Regina |
| America/Resolute |
| America/Rio\_Branco |
| America/Santarem |
| America/Santiago |
| America/Santo\_Domingo |
| America/Sao\_Paulo |
| America/Scoresbysund |
| America/Sitka |
| America/St\_Barthelemy |
| America/St\_Johns |
| America/St\_Kitts |
| America/St\_Lucia |
| America/St\_Thomas |
| America/St\_Vincent |
| America/Swift\_Current |
| America/Tegucigalpa |
| America/Thule |
| America/Tijuana |
| America/Toronto |
| America/Tortola |
| America/Vancouver |
| America/Whitehorse |
| America/Winnipeg |
| America/Yakutat |
| America/Yellowknife |
| Antarctica/Casey |
| Antarctica/Davis |
| Antarctica/DumontDUrville |
| Antarctica/Macquarie |
| Antarctica/Mawson |
| Antarctica/McMurdo |
| Antarctica/Palmer |
| Antarctica/Rothera |
| Antarctica/Syowa |
| Antarctica/Troll |
| Antarctica/Vostok |
| Arctic/Longyearbyen |
| Asia/Aden |
| Asia/Almaty |
| Asia/Amman |
| Asia/Anadyr |
| Asia/Aqtau |
| Asia/Aqtobe |
| Asia/Ashgabat |
| Asia/Atyrau |
| Asia/Baghdad |
| Asia/Bahrain |
| Asia/Baku |
| Asia/Bangkok |
| Asia/Barnaul |
| Asia/Beirut |
| Asia/Bishkek |
| Asia/Brunei |
| Asia/Chita |
| Asia/Choibalsan |
| Asia/Colombo |
| Asia/Damascus |
| Asia/Dhaka |
| Asia/Dili |
| Asia/Dubai |
| Asia/Dushanbe |
| Asia/Famagusta |
| Asia/Gaza |
| Asia/Hebron |
| Asia/Ho\_Chi\_Minh |
| Asia/Hong\_Kong |
| Asia/Hovd |
| Asia/Irkutsk |
| Asia/Jakarta |
| Asia/Jayapura |
| Asia/Jerusalem |
| Asia/Kabul |
| Asia/Kamchatka |
| Asia/Karachi |
| Asia/Kathmandu |
| Asia/Khandyga |
| Asia/Kolkata |
| Asia/Krasnoyarsk |
| Asia/Kuala\_Lumpur |
| Asia/Kuching |
| Asia/Kuwait |
| Asia/Macau |
| Asia/Magadan |
| Asia/Makassar |
| Asia/Manila |
| Asia/Muscat |
| Asia/Nicosia |
| Asia/Novokuznetsk |
| Asia/Novosibirsk |
| Asia/Omsk |
| Asia/Oral |
| Asia/Phnom\_Penh |
| Asia/Pontianak |
| Asia/Pyongyang |
| Asia/Qatar |
| Asia/Qostanay |
| Asia/Qyzylorda |
| Asia/Riyadh |
| Asia/Sakhalin |
| Asia/Samarkand |
| Asia/Seoul |
| Asia/Shanghai |
| Asia/Singapore |
| Asia/Srednekolymsk |
| Asia/Taipei |
| Asia/Tashkent |
| Asia/Tbilisi |
| Asia/Tehran |
| Asia/Thimphu |
| Asia/Tokyo |
| Asia/Tomsk |
| Asia/Ulaanbaatar |
| Asia/Urumqi |
| Asia/Ust-Nera |
| Asia/Vientiane |
| Asia/Vladivostok |
| Asia/Yakutsk |
| Asia/Yangon |
| Asia/Yekaterinburg |
| Asia/Yerevan |
| Atlantic/Azores |
| Atlantic/Bermuda |
| Atlantic/Canary |
| Atlantic/Cape\_Verde |
| Atlantic/Faroe |
| Atlantic/Madeira |
| Atlantic/Reykjavik |
| Atlantic/South\_Georgia |
| Atlantic/St\_Helena |
| Atlantic/Stanley |
| Australia/Adelaide |
| Australia/Brisbane |
| Australia/Broken\_Hill |
| Australia/Darwin |
| Australia/Eucla |
| Australia/Hobart |
| Australia/Lindeman |
| Australia/Lord\_Howe |
| Australia/Melbourne |
| Australia/Perth |
| Australia/Sydney |
| Europe/Amsterdam |
| Europe/Andorra |
| Europe/Astrakhan |
| Europe/Athens |
| Europe/Belgrade |
| Europe/Berlin |
| Europe/Bratislava |
| Europe/Brussels |
| Europe/Bucharest |
| Europe/Budapest |
| Europe/Busingen |
| Europe/Chisinau |
| Europe/Copenhagen |
| Europe/Dublin |
| Europe/Gibraltar |
| Europe/Guernsey |
| Europe/Helsinki |
| Europe/Isle\_of\_Man |
| Europe/Istanbul |
| Europe/Jersey |
| Europe/Kaliningrad |
| Europe/Kirov |
| Europe/Kyiv |
| Europe/Lisbon |
| Europe/Ljubljana |
| Europe/London |
| Europe/Luxembourg |
| Europe/Madrid |
| Europe/Malta |
| Europe/Mariehamn |
| Europe/Minsk |
| Europe/Monaco |
| Europe/Moscow |
| Europe/Oslo |
| Europe/Paris |
| Europe/Podgorica |
| Europe/Prague |
| Europe/Riga |
| Europe/Rome |
| Europe/Samara |
| Europe/San\_Marino |
| Europe/Sarajevo |
| Europe/Saratov |
| Europe/Simferopol |
| Europe/Skopje |
| Europe/Sofia |
| Europe/Stockholm |
| Europe/Tallinn |
| Europe/Tirane |
| Europe/Ulyanovsk |
| Europe/Vaduz |
| Europe/Vatican |
| Europe/Vienna |
| Europe/Vilnius |
| Europe/Volgograd |
| Europe/Warsaw |
| Europe/Zagreb |
| Europe/Zurich |
| Indian/Antananarivo |
| Indian/Chagos |
| Indian/Christmas |
| Indian/Cocos |
| Indian/Comoro |
| Indian/Kerguelen |
| Indian/Mahe |
| Indian/Maldives |
| Indian/Mauritius |
| Indian/Mayotte |
| Indian/Reunion |
| Pacific/Apia |
| Pacific/Auckland |
| Pacific/Bougainville |
| Pacific/Chatham |
| Pacific/Chuuk |
| Pacific/Easter |
| Pacific/Efate |
| Pacific/Fakaofo |
| Pacific/Fiji |
| Pacific/Funafuti |
| Pacific/Galapagos |
| Pacific/Gambier |
| Pacific/Guadalcanal |
| Pacific/Guam |
| Pacific/Honolulu |
| Pacific/Kanton |
| Pacific/Kiritimati |
| Pacific/Kosrae |
| Pacific/Kwajalein |
| Pacific/Majuro |
| Pacific/Marquesas |
| Pacific/Midway |
| Pacific/Nauru |
| Pacific/Niue |
| Pacific/Norfolk |
| Pacific/Noumea |
| Pacific/Pago\_Pago |
| Pacific/Palau |
| Pacific/Pitcairn |
| Pacific/Pohnpei |
| Pacific/Port\_Moresby |
| Pacific/Rarotonga |
| Pacific/Saipan |
| Pacific/Tahiti |
| Pacific/Tarawa |
| Pacific/Tongatapu |
| Pacific/Wake |
| Pacific/Wallis |
### authorization
Specifies the authorization token to include with the API request, typically used to access protected resources.\
This should be a string encoded in Base64 and passed as the value of the `Authorization` header.
**Example:** `authorization=<base64-encoded-token>`
**Note:** Ensure the token is properly encoded to avoid authentication errors. Common formats include Basic Auth (`username:password`) or Bearer tokens, depending on the target service.
### attachment\_name
This parameter specifies the name of the attachment for the result. It should be a string without the extension. The extension will be computed from the response. This can be useful for identifying the screenshot in a list of attachments. Example: `attachment_name=screenshot`.
### user\_agent
This parameter specifies the user agent string to use for the request. It should be a string. This allows for simulating different browsers or devices. Example: `user_agent=Mozilla/5.0 (Windows NT 10.0; Win64; x64) AppleWebKit/537.36 (KHTML, like Gecko) Chrome/58.0.3029.110 Safari/537.3`.
### cookies
This parameter allows for specifying cookies to include in the request. It should be an array of strings. This can be useful for maintaining session state. Example: `cookies=session_id=abc123&cookies=user_id=xyz789`.
### headers
This parameter allows for specifying additional headers to include in the request. It should be an array of strings. This can be useful for passing custom headers. Example: `headers=X-Custom-Header:value`.
### ip\_location
This parameter specifies the IP location to simulate. It should be a string that matches one of the supported values.
Example:\
`ip_location=us`
Supported values:
| Country Code | Country |
| ------------ | ---------------------------------- |
| us | United States |
| cn | China |
| eu | European Union (random EU country) |
| ca | Canada |
| mx | Mexico |
| gb | United Kingdom |
| de | Germany |
| fr | France |
| ch | Switzerland |
| in | India |
| jp | Japan |
| kr | South Korea |
| ru | Russia |
| br | Brazil |
| au | Australia |
### bypass\_csp
This parameter indicates whether to bypass Content Security Policy during the capture. It is a boolean value with a default of `false`. This can be useful for testing pages with strict CSP. Example: `bypass_csp=true`.
### proxy
This parameter specifies a proxy server to use for the request. It should be a string in URI format. This can be useful for routing requests through a specific server. Example: `proxy=http://proxy.example.com:8080`.
## Wait
This section describes the parameters that can be used to control the timing of the capture process.
### delay
This parameter sets a delay in seconds before taking the capture. It must be an integer between 0 and 30, with a default of 0. This can help ensure that the page is fully loaded before capturing. Example: `delay=5`.
### timeout
This parameter sets a timeout in seconds for the request. It must be an integer between 0 and 30, with a default of 30. This can help prevent long waits for unresponsive pages. Example: `timeout=10`.
### wait\_until
This parameter specifies the events to wait for before taking the capture.\
It should be an array of strings that match one of the supported events.\
Default is `domcontentloaded`.
Example: `wait_until=load&wait_until=networkidle0`
| Event | Description |
| ------------------ | ------------------------------------------------------------------------------------------------- |
| `load` | Waits for the `load` event to fire (all resources including images and scripts). |
| `domcontentloaded` | Waits for the DOMContentLoaded event (when the initial HTML document is fully loaded and parsed). |
| `networkidle0` | Waits until there are no more than 0 network connections for at least 500 ms. |
| `networkidle2` | Waits until there are no more than 2 network connections for at least 500 ms. |
## Metadata
The metadata parameters allow you to include additional information in the capture request. This can be useful for debugging, analysis, or simply to provide more context about the captured content.
### metadata\_icon
This parameter indicates whether to include the website's icon (favicon) in the metadata. It is a boolean value with a default of `false`. Example: `metadata_icon=true`.
If enabled, the response headers will include: `X-Screenshotmax-Metadata-Icon` — the URL path to the favicon of the target webpage.
### metadata\_fonts
This parameter indicates whether to include font information in the metadata. It is a boolean value with a default of `false`. This can be useful for analyzing the fonts used on the webpage. Example: `metadata_fonts=true`.
If enabled, the response headers will include: `X-Screenshotmax-Metadata-Fonts` — a comma-separated list of fonts used on the page.
### metadata\_title
This parameter indicates whether to include the page title in the metadata. It is a boolean value with a default of `false`. Example: `metadata_title=true`.
If enabled, the response headers will include: `X-Screenshotmax-Metadata-Title` — the `<title>` of the target webpage.
### metadata\_status
This parameter indicates whether to include the HTTP status in the metadata. It is a boolean value with a default of `false`. This can be useful for understanding the response status of the request. Example: `metadata_status=true`.
If enabled, the response headers will include: `X-Screenshotmax-Metadata-Status` — the HTTP status code of the response.
### metadata\_headers
This parameter indicates whether to include the response headers in the metadata. It is a boolean value with a default of `false`. This can help in analyzing the headers returned by the server. Example: `metadata_headers=true`.
If enabled, the response headers will include: `X-Screenshotmax-Metadata-Headers` — a JSON string of all response headers from the target webpage.
### metadata\_hash
This parameter indicates whether to include a hash of the captured content in the metadata. It is a boolean value with a default of `false`. Example: `metadata_hash=true`.
If enabled, the response headers will include: `X-Screenshotmax-Metadata-Hash` — a SHA-256 hash of the webpage content, useful for change detection.
## Caching
This section outlines the parameters available to configure caching behavior for content responses in API requests.
Captured content can be stored in the cache for a specified duration, enabling faster retrieval of previously processed results.
This helps reduce load times and improve performance for frequently accessed content.
Cached content is accessible via a URL in the following format:
[https://cache.screenshotmax.com/\{hash}.\{ext}](https://cache.screenshotmax.com/\{hash}.\{ext})
In the response headers, the key `X-Screenshotmax-Cache-Url` provides the direct URL to the cached version of the content.
### cache
This parameter indicates whether to enable caching for the result. It is a boolean value with a default of `false`. Example: `cache=true`.
### cache\_ttl
This parameter sets the time-to-live for cached result in seconds. It must be an integer between 1 and 2,592,000 (30 days), with a default of 604,800 (7 days). This controls how long cached results are kept. Example: `cache_ttl=86400`.
## Async and Webhook
This section outlines the parameters used for asynchronous processing and webhook notifications in API requests.
### async
This parameter indicates whether the request should be processed asynchronously. It is a boolean value with a default of `false`. This can be useful for handling long-running requests without blocking. Example: `async=true`.
### webhook\_url
This parameter specifies a webhook URL to send notifications to when the request is completed. It should be a string in URI format.
The webhook URL muste support POST requests and be publicly accessible. Example: `webhook_url=https://example.com/webhook`.
### webhook\_signed
This parameter indicates whether the webhook should be signed for security. It is a boolean value with a default of `true`. This can help ensure that notifications are from a trusted source. Example: `webhook_signed=false`.
The signature is a SHA-256 hash of the request body combined with your secret key. It ensures the authenticity of the notification and protects against tampering.
For details on how to verify the signature, refer to the [signed requests documentation](https://docs.screenshotmax.com/guides/start/signed-requests).
# Screenshot Options
Source: https://docs.screenshotmax.com/guides/references/screenshot-options
Customize screenshot generation with ScreenshotMAX API
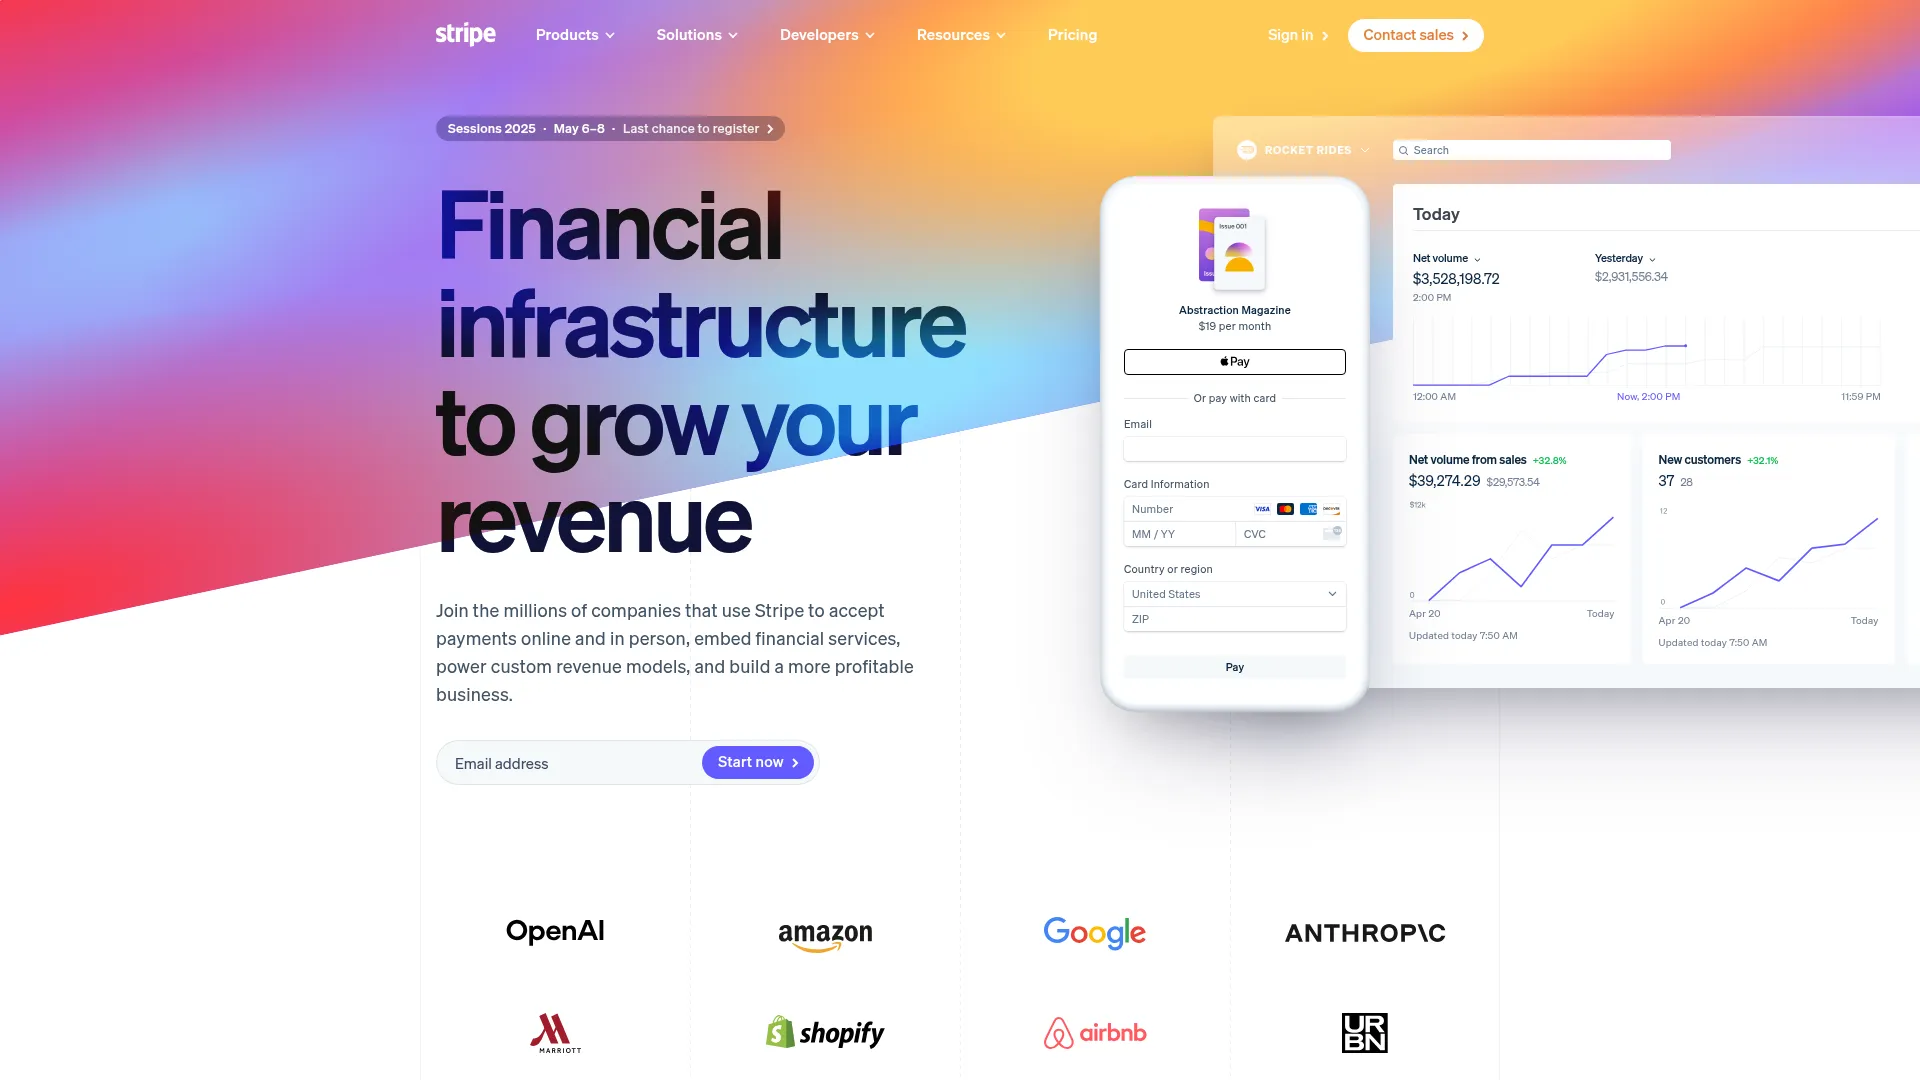
<Frame caption="Example of https://stripe.com screenshot">
</Frame>
## Credentials
### access\_key
This parameter is used to authenticate API requests. It should be a string with a maximum length of 24 characters. Every request to the ScreenshotMAX API must include a valid `access_key`, which identifies the calling account. Example: `access_key=abcd1234efgh5678ijkl9012`.
### signature
This parameter is used to verify the authenticity of the request. It should be a string with a maximum length of 64 characters. The `signature` is generated using the `access_key` and your secret key, ensuring that the request has not been tampered with. Example: `signature=abcd1234efgh5678ijkl9012mnop3456`.
## Essential
### url
Defines the target webpage to capture. This parameter must be a valid URL.
You can pass the URL as either a plain string or a percent-encoded string.\
Use encoded format when the URL contains query parameters to avoid conflicts with the API's own querystring.
**Examples:**
* Plain: `url=https://www.example.com`
* Encoded: `url=https%3A%2F%2Fwww.example.com%3Fparam1%3Dvalue1%26param2%3Dvalue2`
### html
This parameter allows you to provide raw HTML content to render and capture as a screenshot
It must be a valid HTML string.
**Either `url` or `html` must be provided.**
Example:
`html=<html><body><h1>Hello, World!</h1></body></html>`
### format
This parameter specifies the format of the screenshot image.\
It should be a string that matches one of the supported values.
**Default value:** `jpeg`
Example:\
`format=png`
Supported values:
| Value | Description |
| ----- | --------------------------------- |
| png | PNG image format (lossless) |
| jpg | JPEG image format (alias of jpeg) |
| jpeg | JPEG image format (default) |
| webp | WebP image format (compressed) |
| gif | GIF image format (static) |
### image\_quality
This parameter specifies the quality of the image. It is an integer value between `1` and `100`, where `1` is the lowest quality and `100` is the highest quality. The default value is `80`.
### image\_width
This parameter specifies the width of the screenshot image in pixels. It is an integer value greater than or equal to `0`. The default value is `0`, which means the image will be captured at the original width.
### image\_height
This parameter specifies the height of the screenshot image in pixels. It is an integer value greater than or equal to `0`. The default value is `0`, which means the image will be captured at the original height.
### omit\_background
This parameter indicates whether to render a transparent background for the image. It is useful when the site does not define a background color. The default value is `false`.
## Full Page
This section describes the parameters used to control the full-page screenshot behavior. These parameters can help capture the entire webpage, including content that may not be visible in the viewport.
### full\_page
This parameter indicates whether to capture a full-page screenshot. When set to `true`, the API captures the entire webpage, including content that may not be visible in the viewport. The default value is `false`.
### full\_page\_scroll
This parameter controls whether to scroll the page to capture the full content.
When set to `true`, the API will automatically scroll from the top of the page to the bottom and then back up to the top before taking the screenshot. This behavior ensures that content loaded dynamically on scroll — such as images with lazy loading or infinite-scroll sections — is properly rendered and included in the capture.
This is especially useful for pages where elements (like images or data) are only loaded into the DOM when they become visible in the viewport.
### full\_page\_scroll\_by\_amount
This parameter specifies the amount to scroll the page when capturing a full-page screenshot. It is an integer value that represents the number of pixels to scroll. The default value is `0`, which means no scrolling.
### full\_page\_scroll\_by\_duration
This parameter specifies the duration of the scroll when capturing a full-page screenshot. It is an integer value that represents the time in milliseconds to wait before scrolling again. The default value is `400` milliseconds.
## GPU
### gpu\_rendering
This parameter determines whether to enable GPU rendering for the webpage. It should be a boolean value, with a default of `false`. Enabling GPU rendering can improve the quality of the capture for complex webpages. Example: `gpu_rendering=true`.
## Viewport
This section describes the parameters used to control the viewport settings for captures. These parameters can help simulate different devices and screen sizes.
### capture\_beyond\_viewport
This parameter allows capturing content beyond the viewport. It is a boolean value with a default of `false`. When set to `true`, the API will capture content that is not currently visible in the viewport. Example: `capture_beyond_viewport=true`.
### viewport\_device
This parameter specifies the device type to simulate for the viewport.\
It should be a string that matches one of the supported device names.
Using this parameter allows the API to emulate different screen sizes and behaviors when capturing screenshots.
Example:\
`viewport_device=iphone_13`
The full list of supported devices is available via the `/devices` endpoint.\
[More information →](https://docs.screenshotmax.com/endpoints/devices)
### viewport\_width
This parameter sets the width of the viewport in pixels. It must be an integer greater than or equal to 0. Adjusting the viewport width can help capture screenshots that match specific screen sizes. Example: `viewport_width=1280`.
### viewport\_height
This parameter sets the height of the viewport in pixels. It must be an integer greater than or equal to 0. Adjusting the viewport height can help capture screenshots that match specific screen sizes. Example: `viewport_height=720`.
### viewport\_landscape
This parameter specifies whether the viewport should be in landscape mode. It is a boolean value. Setting this to `true` will change the orientation of the viewport. Example: `viewport_landscape=true`.
### viewport\_has\_touch
This parameter indicates whether the viewport has touch capabilities. It is a boolean value. This affects how the page is rendered and can be useful for mobile simulations. Example: `viewport_has_touch=true`.
### viewport\_mobile
This parameter indicates whether the viewport is a mobile device. It is a boolean value. Setting this to `true` will simulate a mobile device environment. Example: `viewport_mobile=true`.
### device\_scale\_factor
This parameter determines the device scale factor for the viewport. It should be a number between 1 and 5. This affects the pixel density of the screen. Example: `device_scale_factor=2`.
## Clip
This section explains the clipping parameters used to define which parts of a webpage are captured.
### clip\_x
This parameter specifies the x-coordinate of the clipped area. It must be an integer greater than or equal to 0. This allows for capturing a specific area of the page. Example: `clip_x=100`.
### clip\_y
This parameter specifies the y-coordinate of the clipped area. It must be an integer greater than or equal to 0. This allows for capturing a specific area of the page. Example: `clip_y=100`.
### clip\_width
This parameter sets the width of the clipped area. It must be an integer greater than or equal to 0. This allows for capturing a specific area of the page. Example: `clip_width=800`.
### clip\_height
This parameter sets the height of the clipped area. It must be an integer greater than or equal to 0. This allows for capturing a specific area of the page. Example: `clip_height=600`.
## Blocking
This section describes the parameters used to block certain elements or resources during the rendering process of the webpage. These parameters help enhance capture speed and content quality by removing unnecessary elements.
### block\_annoyance
This parameter specifies the type of annoyance to block during the capture.\
It should be a string that matches one of the supported values.
Default value: `cookies_banner`\
Example:\
`block_annoyance=ads`
Supported values:
| Value | Description |
| --------------- | -------------------------------------- |
| none | No blocking; capture the page as-is |
| ads | Block advertisements |
| tracking | Block tracking scripts and pixels |
| cookies\_banner | Block cookie consent banners (default) |
### block\_ressources
This parameter specifies the types of resources to block during the capture.\
It should be an array of strings that match the supported resource types.
Example:\
`block_ressources=image&block_ressources=stylesheet`
Supported resource types:
| Resource Type | Description |
| ------------- | --------------------------------------- |
| document | Main HTML documents |
| stylesheet | CSS stylesheets |
| image | Images (e.g., JPEG, PNG, SVG) |
| media | Audio and video files |
| font | Web fonts |
| script | JavaScript files |
| texttrack | Text tracks for media (e.g., subtitles) |
| xhr | XMLHttpRequests (AJAX calls) |
| fetch | Fetch API requests |
| eventsource | Server-Sent Events (SSE) |
| websocket | WebSocket connections |
| manifest | Web app manifests |
| other | Other types not explicitly listed above |
## Emulation
This section describes the parameters used to control the emulation behavior for captures. These parameters can help simulate different environments and conditions for capturing webpages.
### media\_type
This parameter specifies the media type for the webpage. It should be a string that matches either `screen` or `print`, with a default of `screen`. This affects how the page is rendered. Example: `media_type=print`.
### vision\_deficiency
This parameter indicates the type of vision deficiency to simulate.\
It should be a string that matches one of the supported values.
This can help test accessibility and ensure your content is perceivable by users with visual impairments.
Example:\
`vision_deficiency=deuteranopia`
Supported values:
| Value | Description |
| ----------------- | -------------------------------------- |
| achromatopsia | Complete color blindness |
| deuteranopia | Red-green color blindness (green-weak) |
| blurred\_vision | Simulates blurred vision |
| reduced\_contrast | Simulates reduced contrast sensitivity |
### dark\_mode
This parameter indicates whether to enable dark mode for the webpage. It is a boolean value with a default of `false`. When set to `true`, the screenshot will render in dark mode. Example: `dark_mode=true`.
### reduced\_motion
This parameter indicates whether to reduce motion effects in the webpage. It is a boolean value with a default of `false`. This can be helpful for accessibility purposes. Example: `reduced_motion=true`.
## Customization
This section describes the parameters used to customize the capture process. These parameters can help tailor the capture to specific needs or preferences.
### hide\_selectors
This parameter specifies selectors to hide during the capture. It should be an array of strings. This can be useful for removing unwanted elements from the content. Example: `hide_selectors=.ad-banner&hide_selectors=.popup`.
### click\_selector
This parameter specifies a selector to click before taking the capture. It should be a string. This allows for interacting with the page before capturing. Example: `click_selector=.start-button`.
## Geolocation
The geolocation parameters allow you to simulate different geographical locations and conditions in your tests. This can be useful for testing location-based features or services.
### geolocation\_accuracy
This parameter sets the accuracy level for geolocation. It must be an integer between 0 and 1,000. This can help simulate different geolocation scenarios. Example: `geolocation_accuracy=200`.
### geolocation\_latitude
This parameter specifies the latitude for geolocation. It must be a number between -90 and 90. This allows for simulating different geographical locations. Example: `geolocation_latitude=37.7749`.
### geolocation\_longitude
This parameter specifies the longitude for geolocation. It must be a number between -180 and 180. This allows for simulating different geographical locations. Example: `geolocation_longitude=-122.4194`.
## Request
This section describes the parameters that can be used in the request to the API.
### timezone
his parameter specifies the time zone for the capture.\
It should be a string that matches one of the supported time zone names.
This helps simulate different local times during the capture process.\
Example:\
`timezone=America/Los_Angeles`
Supported values:
| Timezone |
| -------------------------------- |
| Africa/Abidjan |
| Africa/Accra |
| Africa/Addis\_Ababa |
| Africa/Algiers |
| Africa/Asmara |
| Africa/Bamako |
| Africa/Bangui |
| Africa/Banjul |
| Africa/Bissau |
| Africa/Blantyre |
| Africa/Brazzaville |
| Africa/Bujumbura |
| Africa/Cairo |
| Africa/Casablanca |
| Africa/Ceuta |
| Africa/Conakry |
| Africa/Dakar |
| Africa/Dar\_es\_Salaam |
| Africa/Djibouti |
| Africa/Douala |
| Africa/El\_Aaiun |
| Africa/Freetown |
| Africa/Gaborone |
| Africa/Harare |
| Africa/Johannesburg |
| Africa/Juba |
| Africa/Kampala |
| Africa/Khartoum |
| Africa/Kigali |
| Africa/Kinshasa |
| Africa/Lagos |
| Africa/Libreville |
| Africa/Lome |
| Africa/Luanda |
| Africa/Lubumbashi |
| Africa/Lusaka |
| Africa/Malabo |
| Africa/Maputo |
| Africa/Maseru |
| Africa/Mbabane |
| Africa/Mogadishu |
| Africa/Monrovia |
| Africa/Nairobi |
| Africa/Ndjamena |
| Africa/Niamey |
| Africa/Nouakchott |
| Africa/Ouagadougou |
| Africa/Porto-Novo |
| Africa/Sao\_Tome |
| Africa/Tripoli |
| Africa/Tunis |
| Africa/Windhoek |
| America/Adak |
| America/Anchorage |
| America/Anguilla |
| America/Antigua |
| America/Araguaina |
| America/Argentina/Buenos\_Aires |
| America/Argentina/Catamarca |
| America/Argentina/Cordoba |
| America/Argentina/Jujuy |
| America/Argentina/La\_Rioja |
| America/Argentina/Mendoza |
| America/Argentina/Rio\_Gallegos |
| America/Argentina/Salta |
| America/Argentina/San\_Juan |
| America/Argentina/San\_Luis |
| America/Argentina/Tucuman |
| America/Argentina/Ushuaia |
| America/Aruba |
| America/Asuncion |
| America/Atikokan |
| America/Bahia |
| America/Bahia\_Banderas |
| America/Barbados |
| America/Belem |
| America/Belize |
| America/Blanc-Sablon |
| America/Boa\_Vista |
| America/Bogota |
| America/Boise |
| America/Cambridge\_Bay |
| America/Campo\_Grande |
| America/Cancun |
| America/Caracas |
| America/Cayenne |
| America/Cayman |
| America/Chicago |
| America/Chihuahua |
| America/Ciudad\_Juarez |
| America/Costa\_Rica |
| America/Creston |
| America/Cuiaba |
| America/Curacao |
| America/Danmarkshavn |
| America/Dawson |
| America/Dawson\_Creek |
| America/Denver |
| America/Detroit |
| America/Dominica |
| America/Edmonton |
| America/Eirunepe |
| America/El\_Salvador |
| America/Fort\_Nelson |
| America/Fortaleza |
| America/Glace\_Bay |
| America/Goose\_Bay |
| America/Grand\_Turk |
| America/Grenada |
| America/Guadeloupe |
| America/Guatemala |
| America/Guayaquil |
| America/Guyana |
| America/Halifax |
| America/Havana |
| America/Hermosillo |
| America/Indiana/Indianapolis |
| America/Indiana/Knox |
| America/Indiana/Marengo |
| America/Indiana/Petersburg |
| America/Indiana/Tell\_City |
| America/Indiana/Vevay |
| America/Indiana/Vincennes |
| America/Indiana/Winamac |
| America/Inuvik |
| America/Iqaluit |
| America/Jamaica |
| America/Juneau |
| America/Kentucky/Louisville |
| America/Kentucky/Monticello |
| America/Kralendijk |
| America/La\_Paz |
| America/Lima |
| America/Los\_Angeles |
| America/Lower\_Princes |
| America/Maceio |
| America/Managua |
| America/Manaus |
| America/Marigot |
| America/Martinique |
| America/Matamoros |
| America/Mazatlan |
| America/Menominee |
| America/Merida |
| America/Metlakatla |
| America/Mexico\_City |
| America/Miquelon |
| America/Moncton |
| America/Monterrey |
| America/Montevideo |
| America/Montserrat |
| America/Nassau |
| America/New\_York |
| America/Nome |
| America/Noronha |
| America/North\_Dakota/Beulah |
| America/North\_Dakota/Center |
| America/North\_Dakota/New\_Salem |
| America/Nuuk |
| America/Ojinaga |
| America/Panama |
| America/Paramaribo |
| America/Phoenix |
| America/Port-au-Prince |
| America/Port\_of\_Spain |
| America/Porto\_Velho |
| America/Puerto\_Rico |
| America/Punta\_Arenas |
| America/Rankin\_Inlet |
| America/Recife |
| America/Regina |
| America/Resolute |
| America/Rio\_Branco |
| America/Santarem |
| America/Santiago |
| America/Santo\_Domingo |
| America/Sao\_Paulo |
| America/Scoresbysund |
| America/Sitka |
| America/St\_Barthelemy |
| America/St\_Johns |
| America/St\_Kitts |
| America/St\_Lucia |
| America/St\_Thomas |
| America/St\_Vincent |
| America/Swift\_Current |
| America/Tegucigalpa |
| America/Thule |
| America/Tijuana |
| America/Toronto |
| America/Tortola |
| America/Vancouver |
| America/Whitehorse |
| America/Winnipeg |
| America/Yakutat |
| America/Yellowknife |
| Antarctica/Casey |
| Antarctica/Davis |
| Antarctica/DumontDUrville |
| Antarctica/Macquarie |
| Antarctica/Mawson |
| Antarctica/McMurdo |
| Antarctica/Palmer |
| Antarctica/Rothera |
| Antarctica/Syowa |
| Antarctica/Troll |
| Antarctica/Vostok |
| Arctic/Longyearbyen |
| Asia/Aden |
| Asia/Almaty |
| Asia/Amman |
| Asia/Anadyr |
| Asia/Aqtau |
| Asia/Aqtobe |
| Asia/Ashgabat |
| Asia/Atyrau |
| Asia/Baghdad |
| Asia/Bahrain |
| Asia/Baku |
| Asia/Bangkok |
| Asia/Barnaul |
| Asia/Beirut |
| Asia/Bishkek |
| Asia/Brunei |
| Asia/Chita |
| Asia/Choibalsan |
| Asia/Colombo |
| Asia/Damascus |
| Asia/Dhaka |
| Asia/Dili |
| Asia/Dubai |
| Asia/Dushanbe |
| Asia/Famagusta |
| Asia/Gaza |
| Asia/Hebron |
| Asia/Ho\_Chi\_Minh |
| Asia/Hong\_Kong |
| Asia/Hovd |
| Asia/Irkutsk |
| Asia/Jakarta |
| Asia/Jayapura |
| Asia/Jerusalem |
| Asia/Kabul |
| Asia/Kamchatka |
| Asia/Karachi |
| Asia/Kathmandu |
| Asia/Khandyga |
| Asia/Kolkata |
| Asia/Krasnoyarsk |
| Asia/Kuala\_Lumpur |
| Asia/Kuching |
| Asia/Kuwait |
| Asia/Macau |
| Asia/Magadan |
| Asia/Makassar |
| Asia/Manila |
| Asia/Muscat |
| Asia/Nicosia |
| Asia/Novokuznetsk |
| Asia/Novosibirsk |
| Asia/Omsk |
| Asia/Oral |
| Asia/Phnom\_Penh |
| Asia/Pontianak |
| Asia/Pyongyang |
| Asia/Qatar |
| Asia/Qostanay |
| Asia/Qyzylorda |
| Asia/Riyadh |
| Asia/Sakhalin |
| Asia/Samarkand |
| Asia/Seoul |
| Asia/Shanghai |
| Asia/Singapore |
| Asia/Srednekolymsk |
| Asia/Taipei |
| Asia/Tashkent |
| Asia/Tbilisi |
| Asia/Tehran |
| Asia/Thimphu |
| Asia/Tokyo |
| Asia/Tomsk |
| Asia/Ulaanbaatar |
| Asia/Urumqi |
| Asia/Ust-Nera |
| Asia/Vientiane |
| Asia/Vladivostok |
| Asia/Yakutsk |
| Asia/Yangon |
| Asia/Yekaterinburg |
| Asia/Yerevan |
| Atlantic/Azores |
| Atlantic/Bermuda |
| Atlantic/Canary |
| Atlantic/Cape\_Verde |
| Atlantic/Faroe |
| Atlantic/Madeira |
| Atlantic/Reykjavik |
| Atlantic/South\_Georgia |
| Atlantic/St\_Helena |
| Atlantic/Stanley |
| Australia/Adelaide |
| Australia/Brisbane |
| Australia/Broken\_Hill |
| Australia/Darwin |
| Australia/Eucla |
| Australia/Hobart |
| Australia/Lindeman |
| Australia/Lord\_Howe |
| Australia/Melbourne |
| Australia/Perth |
| Australia/Sydney |
| Europe/Amsterdam |
| Europe/Andorra |
| Europe/Astrakhan |
| Europe/Athens |
| Europe/Belgrade |
| Europe/Berlin |
| Europe/Bratislava |
| Europe/Brussels |
| Europe/Bucharest |
| Europe/Budapest |
| Europe/Busingen |
| Europe/Chisinau |
| Europe/Copenhagen |
| Europe/Dublin |
| Europe/Gibraltar |
| Europe/Guernsey |
| Europe/Helsinki |
| Europe/Isle\_of\_Man |
| Europe/Istanbul |
| Europe/Jersey |
| Europe/Kaliningrad |
| Europe/Kirov |
| Europe/Kyiv |
| Europe/Lisbon |
| Europe/Ljubljana |
| Europe/London |
| Europe/Luxembourg |
| Europe/Madrid |
| Europe/Malta |
| Europe/Mariehamn |
| Europe/Minsk |
| Europe/Monaco |
| Europe/Moscow |
| Europe/Oslo |
| Europe/Paris |
| Europe/Podgorica |
| Europe/Prague |
| Europe/Riga |
| Europe/Rome |
| Europe/Samara |
| Europe/San\_Marino |
| Europe/Sarajevo |
| Europe/Saratov |
| Europe/Simferopol |
| Europe/Skopje |
| Europe/Sofia |
| Europe/Stockholm |
| Europe/Tallinn |
| Europe/Tirane |
| Europe/Ulyanovsk |
| Europe/Vaduz |
| Europe/Vatican |
| Europe/Vienna |
| Europe/Vilnius |
| Europe/Volgograd |
| Europe/Warsaw |
| Europe/Zagreb |
| Europe/Zurich |
| Indian/Antananarivo |
| Indian/Chagos |
| Indian/Christmas |
| Indian/Cocos |
| Indian/Comoro |
| Indian/Kerguelen |
| Indian/Mahe |
| Indian/Maldives |
| Indian/Mauritius |
| Indian/Mayotte |
| Indian/Reunion |
| Pacific/Apia |
| Pacific/Auckland |
| Pacific/Bougainville |
| Pacific/Chatham |
| Pacific/Chuuk |
| Pacific/Easter |
| Pacific/Efate |
| Pacific/Fakaofo |
| Pacific/Fiji |
| Pacific/Funafuti |
| Pacific/Galapagos |
| Pacific/Gambier |
| Pacific/Guadalcanal |
| Pacific/Guam |
| Pacific/Honolulu |
| Pacific/Kanton |
| Pacific/Kiritimati |
| Pacific/Kosrae |
| Pacific/Kwajalein |
| Pacific/Majuro |
| Pacific/Marquesas |
| Pacific/Midway |
| Pacific/Nauru |
| Pacific/Niue |
| Pacific/Norfolk |
| Pacific/Noumea |
| Pacific/Pago\_Pago |
| Pacific/Palau |
| Pacific/Pitcairn |
| Pacific/Pohnpei |
| Pacific/Port\_Moresby |
| Pacific/Rarotonga |
| Pacific/Saipan |
| Pacific/Tahiti |
| Pacific/Tarawa |
| Pacific/Tongatapu |
| Pacific/Wake |
| Pacific/Wallis |
### authorization
Specifies the authorization token to include with the API request, typically used to access protected resources.\
This should be a string encoded in Base64 and passed as the value of the `Authorization` header.
**Example:** `authorization=<base64-encoded-token>`
**Note:** Ensure the token is properly encoded to avoid authentication errors. Common formats include Basic Auth (`username:password`) or Bearer tokens, depending on the target service.
### attachment\_name
This parameter specifies the name of the attachment for the result. It should be a string without the extension. The extension will be computed from the response. This can be useful for identifying the screenshot in a list of attachments. Example: `attachment_name=screenshot`.
### user\_agent
This parameter specifies the user agent string to use for the request. It should be a string. This allows for simulating different browsers or devices. Example: `user_agent=Mozilla/5.0 (Windows NT 10.0; Win64; x64) AppleWebKit/537.36 (KHTML, like Gecko) Chrome/58.0.3029.110 Safari/537.3`.
### cookies
This parameter allows for specifying cookies to include in the request. It should be an array of strings. This can be useful for maintaining session state. Example: `cookies=session_id=abc123&cookies=user_id=xyz789`.
### headers
This parameter allows for specifying additional headers to include in the request. It should be an array of strings. This can be useful for passing custom headers. Example: `headers=X-Custom-Header:value`.
### ip\_location
This parameter specifies the IP location to simulate. It should be a string that matches one of the supported values.
Example:\
`ip_location=us`
Supported values:
| Country Code | Country |
| ------------ | ---------------------------------- |
| us | United States |
| cn | China |
| eu | European Union (random EU country) |
| ca | Canada |
| mx | Mexico |
| gb | United Kingdom |
| de | Germany |
| fr | France |
| ch | Switzerland |
| in | India |
| jp | Japan |
| kr | South Korea |
| ru | Russia |
| br | Brazil |
| au | Australia |
### bypass\_csp
This parameter indicates whether to bypass Content Security Policy during the capture. It is a boolean value with a default of `false`. This can be useful for testing pages with strict CSP. Example: `bypass_csp=true`.
### proxy
This parameter specifies a proxy server to use for the request. It should be a string in URI format. This can be useful for routing requests through a specific server. Example: `proxy=http://proxy.example.com:8080`.
## Wait
This section describes the parameters that can be used to control the timing of the capture process.
### delay
This parameter sets a delay in seconds before taking the capture. It must be an integer between 0 and 30, with a default of 0. This can help ensure that the page is fully loaded before capturing. Example: `delay=5`.
### timeout
This parameter sets a timeout in seconds for the request. It must be an integer between 0 and 30, with a default of 30. This can help prevent long waits for unresponsive pages. Example: `timeout=10`.
### wait\_until
This parameter specifies the events to wait for before taking the capture.\
It should be an array of strings that match one of the supported events.\
Default is `domcontentloaded`.
Example: `wait_until=load&wait_until=networkidle0`
| Event | Description |
| ------------------ | ------------------------------------------------------------------------------------------------- |
| `load` | Waits for the `load` event to fire (all resources including images and scripts). |
| `domcontentloaded` | Waits for the DOMContentLoaded event (when the initial HTML document is fully loaded and parsed). |
| `networkidle0` | Waits until there are no more than 0 network connections for at least 500 ms. |
| `networkidle2` | Waits until there are no more than 2 network connections for at least 500 ms. |
## Metadata
The metadata parameters allow you to include additional information in the capture request. This can be useful for debugging, analysis, or simply to provide more context about the captured content.
### metadata\_icon
This parameter indicates whether to include the website's icon (favicon) in the metadata. It is a boolean value with a default of `false`. Example: `metadata_icon=true`.
If enabled, the response headers will include: `X-Screenshotmax-Metadata-Icon` — the URL path to the favicon of the target webpage.
### metadata\_fonts
This parameter indicates whether to include font information in the metadata. It is a boolean value with a default of `false`. This can be useful for analyzing the fonts used on the webpage. Example: `metadata_fonts=true`.
If enabled, the response headers will include: `X-Screenshotmax-Metadata-Fonts` — a comma-separated list of fonts used on the page.
### metadata\_title
This parameter indicates whether to include the page title in the metadata. It is a boolean value with a default of `false`. Example: `metadata_title=true`.
If enabled, the response headers will include: `X-Screenshotmax-Metadata-Title` — the `<title>` of the target webpage.
### metadata\_status
This parameter indicates whether to include the HTTP status in the metadata. It is a boolean value with a default of `false`. This can be useful for understanding the response status of the request. Example: `metadata_status=true`.
If enabled, the response headers will include: `X-Screenshotmax-Metadata-Status` — the HTTP status code of the response.
### metadata\_headers
This parameter indicates whether to include the response headers in the metadata. It is a boolean value with a default of `false`. This can help in analyzing the headers returned by the server. Example: `metadata_headers=true`.
If enabled, the response headers will include: `X-Screenshotmax-Metadata-Headers` — a JSON string of all response headers from the target webpage.
### metadata\_hash
This parameter indicates whether to include a hash of the captured content in the metadata. It is a boolean value with a default of `false`. Example: `metadata_hash=true`.
If enabled, the response headers will include: `X-Screenshotmax-Metadata-Hash` — a SHA-256 hash of the webpage content, useful for change detection.
### metadata\_image\_size
This parameter indicates whether to include the size of the captured image in the metadata. It is a boolean value with a default of `false`. Example: `metadata_image_size=true`.
If enabled, the response headers will include: `X-Screenshotmax-Metadata-Image-Size` — the width and height of the captured image in pixels (e.g., `1920x1080`).
## Caching
This section outlines the parameters available to configure caching behavior for content responses in API requests.
Captured content can be stored in the cache for a specified duration, enabling faster retrieval of previously processed results.
This helps reduce load times and improve performance for frequently accessed content.
Cached content is accessible via a URL in the following format:
[https://cache.screenshotmax.com/\{hash}.\{ext}](https://cache.screenshotmax.com/\{hash}.\{ext})
In the response headers, the key `X-Screenshotmax-Cache-Url` provides the direct URL to the cached version of the content.
### cache
This parameter indicates whether to enable caching for the result. It is a boolean value with a default of `false`. Example: `cache=true`.
### cache\_ttl
This parameter sets the time-to-live for cached result in seconds. It must be an integer between 1 and 2,592,000 (30 days), with a default of 604,800 (7 days). This controls how long cached results are kept. Example: `cache_ttl=86400`.
## Async and Webhook
This section outlines the parameters used for asynchronous processing and webhook notifications in API requests.
### async
This parameter indicates whether the request should be processed asynchronously. It is a boolean value with a default of `false`. This can be useful for handling long-running requests without blocking. Example: `async=true`.
### webhook\_url
This parameter specifies a webhook URL to send notifications to when the request is completed. It should be a string in URI format.
The webhook URL muste support POST requests and be publicly accessible. Example: `webhook_url=https://example.com/webhook`.
### webhook\_signed
This parameter indicates whether the webhook should be signed for security. It is a boolean value with a default of `true`. This can help ensure that notifications are from a trusted source. Example: `webhook_signed=false`.
The signature is a SHA-256 hash of the request body combined with your secret key. It ensures the authenticity of the notification and protects against tampering.
For details on how to verify the signature, refer to the [signed requests documentation](https://docs.screenshotmax.com/guides/start/signed-requests).
# Get Usage
Source: https://docs.screenshotmax.com/guides/references/usage
Get usage statistics for your account
# C#
Source: https://docs.screenshotmax.com/guides/sdks/csharp
The ScreenshotMAX C# SDK provides a streamlined interface for integrating ScreenshotMAX’s screenshot capabilities into your Go applications. It simplifies tasks such as authentication, request signing, and interacting with the ScreenshotMAX API.
# Go Code Samples
Source: https://docs.screenshotmax.com/guides/sdks/go
Use ScreenshotMAX API in Go to capture website screenshots, automate rendering tasks, and securely generate images with signed API requests. Fast, reliable, and developer-friendly.
## ScreenshotMAX with Go
Use Go to interact with the ScreenshotMAX API via `net/http`. Below are examples for simple and signed screenshot requests.
### Basic GET Screenshot
```go theme={null}
package main
import (
"fmt"
"io"
"net/http"
"net/url"
"os"
)
func main() {
endpoint := "https://api.screenshotmax.com/v1/screenshot"
params := url.Values{}
params.Add("access_key", "YOUR_ACCESS_KEY")
params.Add("url", "https://example.com")
params.Add("format", "png")
fullURL := endpoint + "?" + params.Encode()
resp, err := http.Get(fullURL)
if err != nil {
fmt.Println("Request failed:", err)
return
}
defer resp.Body.Close()
out, err := os.Create("screenshot.png")
if err != nil {
fmt.Println("File error:", err)
return
}
defer out.Close()
io.Copy(out, resp.Body)
fmt.Println("Image saved to screenshot.png")
}
```
***
### HMAC-Signed GET Screenshot
```go theme={null}
package main
import (
"crypto/hmac"
"crypto/sha256"
"encoding/hex"
"fmt"
"io"
"net/http"
"net/url"
"os"
)
func main() {
accessKey := "YOUR_ACCESS_KEY"
secretKey := "YOUR_SECRET_KEY"
baseURL := "https://api.screenshotmax.com/v1/screenshot"
query := url.Values{}
query.Set("access_key", accessKey)
query.Set("url", "https://example.com")
query.Set("format", "png")
qs := query.Encode()
signature := signHMAC(qs, secretKey)
// Add signature to query
query.Set("signature", signature)
fullURL := baseURL + "?" + query.Encode()
resp, err := http.Get(fullURL)
if err != nil {
fmt.Println("Request failed:", err)
return
}
defer resp.Body.Close()
out, _ := os.Create("screenshot.png")
io.Copy(out, resp.Body)
fmt.Println("Image saved to screenshot.png")
}
func signHMAC(message, secret string) string {
mac := hmac.New(sha256.New, []byte(secret))
mac.Write([]byte(message))
return hex.EncodeToString(mac.Sum(nil))
}
```
***
## Next Steps
* Explore other API options like HTML to PDF, animated screenshots, or web scraping.
* Create scheduled recurring screenshots via [**Scheduled Tasks API**](/guides/start/scheduled-tasks)
## Support
For questions, issues, or feature requests, please contact our support team at [support@screenshotmax.com](mailto:support@screenshotmax.com).
# Java Code Samples
Source: https://docs.screenshotmax.com/guides/sdks/java
Use ScreenshotMAX API in Java to capture website screenshots, automate rendering tasks, and securely generate images with signed API requests. Fast, reliable, and developer-friendly.
## ScreenshotMAX with Java
Use Java's built-in HTTP client (`java.net.http`) to make signed or direct API calls.
### Basic GET Screenshot
```java theme={null}
import java.io.*;
import java.net.*;
public class Main {
public static void main(String[] args) throws Exception {
String accessKey = "YOUR_ACCESS_KEY";
String api = "https://api.screenshotmax.com/v1/screenshot";
String params = String.format("access_key=%s&url=%s&format=png",
accessKey,
URLEncoder.encode("https://example.com", "UTF-8"));
URL url = new URL(api + "?" + params);
InputStream in = url.openStream();
Files.copy(in, Path.of("screenshot.png"), StandardCopyOption.REPLACE_EXISTING);
in.close();
System.out.println("Image saved to screenshot.png");
}
}
```
***
### HMAC-Signed GET Screenshot
```java theme={null}
import javax.crypto.Mac;
import javax.crypto.spec.SecretKeySpec;
import java.io.InputStream;
import java.net.URI;
import java.net.URLEncoder;
import java.net.http.*;
import java.nio.charset.StandardCharsets;
import java.nio.file.Files;
import java.nio.file.Path;
public class ScreenshotMAX {
public static void main(String[] args) throws Exception {
String accessKey = "YOUR_ACCESS_KEY";
String secretKey = "YOUR_SECRET_KEY";
String api = "https://api.screenshotmax.com/v1/screenshot";
String urlParam = URLEncoder.encode("https://example.com", "UTF-8");
String format = "png";
String query = "url=" + urlParam + "&format=" + format + "&access_key=" + accessKey;
String signature = sign(secretKey, query);
String finalURL = api + "?" + query + "&signature=" + signature;
HttpRequest request = HttpRequest.newBuilder()
.uri(URI.create(finalURL))
.GET()
.build();
HttpClient client = HttpClient.newHttpClient();
HttpResponse<InputStream> response = client.send(request, HttpResponse.BodyHandlers.ofInputStream());
Files.copy(response.body(), Path.of("screenshot.png"));
System.out.println("Screenshot saved to screenshot.png");
}
private static String sign(String key, String message) throws Exception {
Mac hmac = Mac.getInstance("HmacSHA256");
hmac.init(new SecretKeySpec(key.getBytes(StandardCharsets.UTF_8), "HmacSHA256"));
byte[] hash = hmac.doFinal(message.getBytes(StandardCharsets.UTF_8));
StringBuilder hex = new StringBuilder();
for (byte b : hash) {
hex.append(String.format("%02x", b));
}
return hex.toString();
}
}
```
***
## Next Steps
* Explore other API options like HTML to PDF, animated screenshots, or web scraping.
* Create scheduled recurring screenshots via [**Scheduled Tasks API**](/guides/start/scheduled-tasks)
## Support
For questions, issues, or feature requests, please contact our support team at [support@screenshotmax.com](mailto:support@screenshotmax.com).
# JavaScript TypeScript SDK
Source: https://docs.screenshotmax.com/guides/sdks/nodejs-javascript-typescript
The ScreenshotMAX SDK for JavaScript and TypeScript offers a clean, developer-friendly interface for accessing the ScreenshotMAX API. It handles authentication, request signing, and URL generation, making it easy to capture screenshots and integrate advanced rendering features into your applications with minimal setup.
The SDK client stays up-to-date with the latest API capabilities.
# Getting Started
#### Install the SDK using [npm](https://www.npmjs.com/package/@screenshotmax/sdk):
```bash theme={null}
npm install @screenshotmax/sdk
```
# Usage Examples
Use the SDK to generate signed or unsigned URLs for screenshots, PDFs, web scraping, or animated screenshot without executing the request. Or fetch and download the result directly. You have full control over when and how each capture runs.
The SDK also supports the Scheduled Tasks API, allowing you to queue captures to run at a later time or on a recurring schedule.
### Screenshot example
```typescript theme={null}
import fs from "node:fs";
import { SDK } from "@screenshotmax/sdk";
// create API client
const sdk = new SDK("YOUR_ACCESS_KEY", "YOUR_SECRET_KEY");
// set up options
sdk.screenshot.setOptions({
url: "https://example.com",
format: "png"
});
// optionally: generate signed URL
// (https://api.screenshotmax.com/v1/screenshot?url=https%3A%2F%2Fexample.com&format=png&access_key=YOUR_ACCESS_KEY&signature=370f5b161bc59eed13b76........1f778635d7fc595dbab12)
const url = sdk.screenshot.getUrl();
// generate screenshot
const result = await sdk.screenshot.fetch();
fs.writeFileSync("screenshot.png", Buffer.from(result.data, "binary"));
```
### PDF generation example
```typescript theme={null}
import fs from "node:fs";
import { SDK } from "@screenshotmax/sdk";
// create API client
const sdk = new SDK("YOUR_ACCESS_KEY", "YOUR_SECRET_KEY");
// set up options and scrape content (chaining)
const result = await sdk.pdf
.setOptions({
url: "https://example.com",
pdf_paper_format: "letter",
})
.fetch();
// generate unsigned URL
// (https://api.screenshotmax.com/v1/pdf?&access_key=YOUR_ACCESS_KEY&url=https%3A%2F%2Fexample.com&pdf_paper_format=letter)
const url = sdk.pdf.getUrl(false);
fs.writeFileSync("pdf.pdf", Buffer.from(result.data, "binary"));
```
### Web scraping example
```typescript theme={null}
import fs from "node:fs";
import { SDK } from "@screenshotmax/sdk";
// create API client
const sdk = new SDK("YOUR_ACCESS_KEY", "YOUR_SECRET_KEY");
// set up options
sdk.scrape.setOptions({
url: "https://example.com",
format: "html",
});
const result = await sdk.scrape.fetch();
fs.writeFileSync("scrape.html", result.data);
```
### Scheduled task example
```typescript theme={null}
import { SDK } from "@screenshotmax/sdk";
// create API client
const sdk = new SDK("<ACCESS_KEY>", "<SECRET_KEY>");
// get all tasks from account
const tasks = await sdk.task.getTasks();
// {
// tasks: [
// {
// id: 5678133109850112,
// name: 'My cron test',
// api: 'screenshot',
// query: 'url=https%3A%2F%2Fexample.com',
// frequency: 'every_day',
// crontab: '25 13 * * *',
// timezone: 'Etc/UTC',
// enabled: true,
// created: 1747229104,
// last_run: 1748438712,
// runs: 16
// }
// ]
// }
```
## Next Steps
* Explore other API options like HTML to PDF, animated screenshots, or web scraping.
* Create scheduled recurring screenshots via [**Scheduled Tasks API**](/guides/start/scheduled-tasks)
## Support
For questions, issues, or feature requests, please open an issue on the [GitHub repository](https://github.com/screenshotmax/typescript-sdk) or contact our support team at [support@screenshotmax.com](mailto:support@screenshotmax.com).
# PHP SDK
Source: https://docs.screenshotmax.com/guides/sdks/php
The ScreenshotMAX PHP SDK provides a streamlined interface for integrating ScreenshotMAX’s screenshot capabilities into your PHP applications. It simplifies tasks such as authentication, request signing, and interacting with the ScreenshotMAX API.
The SDK client stays up-to-date with the latest API capabilities.
# Getting Started
#### Install the SDK using [Composer](https://packagist.org/packages/screenshotmax/sdk/):
```bash theme={null}
composer require screenshotmax/sdk
```
# Usage Examples
Use the SDK to generate signed or unsigned URLs for screenshots, PDFs, web scraping, or animated screenshot without executing the request. Or fetch and download the result directly. You have full control over when and how each capture runs.
The SDK also supports the Scheduled Tasks API, allowing you to queue captures to run at a later time or on a recurring schedule.
### Screenshot example
```php theme={null}
<?php
use ScreenshotMax\SDK;
use ScreenshotMax\Options\ScreenshotOptions;
$sdk = new SDK("YOUR_ACCESS_KEY", "YOUR_SECRET_KEY");
// set up options
$opts = new ScreenshotOptions();
$opts->url = "https://example.com";
$opts->format = "png";
$result = $sdk->screenshot->setOptions($opts)->fetch();
// optionally: generate signed URL
// (https://api.screenshotmax.com/v1/screenshot?url=https%3A%2F%2Fexample.com&format=png&access_key=YOUR_ACCESS_KEY&signature=370f5b161bc59eed13b76........1f778635d7fc595dbab12)
$url = $sdk->screenshot->getUrl();
// save screenshot to file
file_put_contents("screenshot.png", $result["data"]);
```
### Web scraping example
```php theme={null}
<?php
use ScreenshotMax\SDK;
use ScreenshotMax\Options\ScrapeOptions;
$sdk = new SDK("YOUR_ACCESS_KEY", "YOUR_SECRET_KEY");
// set up options and scrape content (chaining)
$opts = new ScrapeOptions();
$opts->url = 'https://example.com';
$sdk->scrape->setOptions($opts);
$result = $sdk->scrape->fetch();
```
### PDF generation example
```php theme={null}
<?php
use ScreenshotMax\SDK;
use ScreenshotMax\Options\PDFOptions;
$sdk = new SDK("YOUR_ACCESS_KEY", "YOUR_SECRET_KEY");
// set up options and scrape content (chaining)
$opts = new PDFOptions();
$opts->url = 'https://example.com';
$opts->pdf_paper_format = 'a4';
$result = $sdk->pdf->setOptions($opts)->fetch();
```
### Scheduled task example
```php theme={null}
<?php
use ScreenshotMax\SDK;
$sdk = new SDK("YOUR_ACCESS_KEY", "YOUR_SECRET_KEY");
// get all tasks from account
$tasks = $sdk->task->getTasks();
print_r($tasks["data"]);
/* {"tasks":[{
"id":5678133109850112,
"name":"Test CRON",
"api":"screenshot",
"query":
"url=https%3A%2F%2Fexample.com",
"frequency":"every_day",
"crontab":"25 13 * * *",
"timezone":"Etc/UTC",
"enabled":true,
"created":1747229104,
"last_run":1748611516,
"runs":18}]}
*/
```
## Next Steps
* Explore other API options like HTML to PDF, animated screenshots, or web scraping.
* Create scheduled recurring screenshots via [**Scheduled Tasks API**](/guides/start/scheduled-tasks)
## Support
For questions, issues, or feature requests, please open an issue on the [GitHub repository](https://github.com/screenshotmax/php-sdk) or contact our support team at [support@screenshotmax.com](mailto:support@screenshotmax.com).
# Python SDK
Source: https://docs.screenshotmax.com/guides/sdks/python
The ScreenshotMAX Python SDK provides a streamlined interface for integrating ScreenshotMAX’s screenshot capabilities into your Python applications. It simplifies tasks such as authentication, request signing, and interacting with the ScreenshotMAX API.
The SDK client stays up-to-date with the latest API capabilities.
# Getting Started
#### Install the SDK using [pip](https://pypi.org/project/screenshotmax/):
```bash theme={null}
pip install screenshotmax
```
# Usage Examples
Use the SDK to generate signed or unsigned URLs for screenshots, PDFs, web scraping, or animated screenshot without executing the request. Or fetch and download the result directly. You have full control over when and how each capture runs.
The SDK also supports the Scheduled Tasks API, allowing you to queue captures to run at a later time or on a recurring schedule.
### Screenshot example
```python theme={null}
from screenshotmax import SDK
from screenshotmax.enum import ImageFormat
from screenshotmax.options import ScreenshotOptions
sdk = SDK("YOUR_ACCESS_KEY", "YOUR_SECRET_KEY")
# set up options
opts = ScreenshotOptions(url="https://example.com", format=ImageFormat.PNG)
# fetch screenshot
result, headers = sdk.screenshot.set_options(opts).fetch()
# optionally: generate signed URL
# (https://api.screenshotmax.com/v1/screenshot?url=https%3A%2F%2Fexample.com&format=png&access_key=YOUR_ACCESS_KEY&signature=370f5b161bc59eed13b76........1f778635d7fc595dbab12)
url = sdk.screenshot.get_url()
# save screenshot to file
with open("screenshot.png", "wb") as f:
f.write(result)
```
### Web scraping example
```python theme={null}
from screenshotmax import SDK
from screenshotmax.options import ScrapeOptions
sdk = SDK("YOUR_ACCESS_KEY", "YOUR_SECRET_KEY")
# set up options and scrape content (chaining)
opts = ScrapeOptions(url="https://example.com")
sdk.scrape.set_options(opts)
result, headers = sdk.scrape.fetch()
```
### PDF generation example
```python theme={null}
from screenshotmax import SDK
from screenshotmax.enums import PDFPaperFormat
from screenshotmax.options import PDFOptions
sdk = SDK("YOUR_ACCESS_KEY", "YOUR_SECRET_KEY")
# set up options and scrape content (chaining)
opts = PDFOptions(url="https://example.com", pdf_paper_format=PDFPaperFormat.LETTER)
result, headers = sdk.pdf.set_options(opts).fetch()
```
### Scheduled task example
```python theme={null}
from screenshotmax import SDK
from screenshotmax.options import PDFOptions
sdk = SDK("YOUR_ACCESS_KEY", "YOUR_SECRET_KEY")
# get all tasks from account
tasks = sdk.task.get_tasks()
# {"tasks":[{
# "id":5678133109850112,
# "name":"Test CRON",
# "api":"screenshot",
# "query":
# "url=https%3A%2F%2Fexample.com",
# "frequency":"every_day",
# "crontab":"25 13 * * *",
# "timezone":"Etc/UTC",
# "enabled":true,
# "created":1747229104,
# "last_run":1748611516,
# "runs":18}]}
```
## Next Steps
* Explore other API options like HTML to PDF, animated screenshots, or web scraping.
* Create scheduled recurring screenshots via [**Scheduled Tasks API**](/guides/start/scheduled-tasks)
## Support
For questions, issues, or feature requests, please open an issue on the [GitHub repository](https://github.com/screenshotmax/python-sdk) or contact our support team at [support@screenshotmax.com](mailto:support@screenshotmax.com).
# Animated Screenshots
Source: https://docs.screenshotmax.com/guides/start/animated-screenshots
The screencast endpoint lets you generate short video captures of your webpage — either as a static animation (video) or a dynamic scroll-through (scroll). It’s great for showcasing your app, previewing a website, or generating media content programmatically.
<Warning>
**Plan Availability**
Available on **Growth and Scale plans**.
Also available in test mode with the **Free** plan.
</Warning>
## Use Case Examples
* Demo your app’s onboarding flow
* Capture animation effects or video players
* Scroll through an entire product page for marketing
* Generate reels or preview clips for social media
## API Parameters
### Optional Parameters
**format**
* Type: string
* Allowed: `webm`, `mp4`, `mov`, `avi`
* Default: `mp4`
* Description: The video output format. `mp4` is widely supported and recommended for general use.
**duration**
* Type: integer
* Range: `1` to `30` seconds
* Default: `5`
* Description: The total duration of the recording. Longer durations are useful for full scrolls or animations.
**scenario**
* Type: string
* Options: `video`, `scroll`
* Default: `video`
* Description:
* `video`: A static screen recording, useful for animations, transitions, or video players.
* `scroll`: Automatically scrolls the page down during recording, ideal for long-form content like blog posts.
#### Scrolling-Specific Options
(Only used when scenario is `scroll`)
**scroll\_by\_amount**
* Type: integer
* Default: `1000`
* Description: Number of pixels to scroll per step.
**scroll\_by\_delay**
* Type: integer (ms)
* Default: `500`
* Description: Time to wait between each scroll step.
**scroll\_by\_duration**
* Type: integer (ms)
* Default: `1500`
* Description: Duration of the scroll animation itself (smooth scroll).
**scroll\_back**
* Type: boolean
* Default: `true`
* Description: If enabled, the page scrolls back up to the top at the end.
**scroll\_back\_delay**
* Type: integer (ms)
* Default: `800`
* Description: Time to wait before starting the scroll-back animation.
**scroll\_easing**
* Type: string
* Default: `linear`
* Description: Easing function applied to scrolling animations. Controls the smoothness and acceleration.
### How the scroll scenario works
When using scenario `scroll` option, the animation simulates a natural reading or browsing experience:
1. The page scrolls down by `scroll_by_amount` pixels.
2. After each scroll, it pauses for `scroll_by_delay` milliseconds.
3. Each scroll movement is animated over `scroll_by_duration` milliseconds for smoothness.
4. This process repeats step-by-step until the bottom of the page is reached.
5. If `scroll_back` is set to true, the page will pause for `scroll_back_delay` milliseconds, then scroll back to the top in one smooth motion.
This gives the impression of a user reading or exploring the page in a relaxed and controlled way — perfect for demos, tutorials, and showcase clips.
#### Making Scrolls Feel Natural with `scroll_easing` parameter
The `scroll_easing` parameter is a powerful tool for controlling the feel of your scroll animations.,It allows you to choose how the scrolling motion behaves, making it more or less dynamic depending on your needs.
The `scroll_easing` parameter affects each scroll step in the `scroll` scenario, giving you fine control over the pacing and fluidity of the motion.
**Why Easing Matters**
A scroll that moves linearly feels robotic. Easing functions allow for acceleration and deceleration, creating a more human-like experience.
**Available Easing Options**
| Easing | Description |
| -------------------- | ----------------------------------------------------------------------------------------------- |
| linear | Constant speed from start to end. Feels mechanical. Good for technical demos or precise timing. |
| ease\_in\_quad | Starts slow, speeds up. Feels like someone starting to scroll carefully, then accelerating. |
| ease\_out\_quad | Starts fast, slows down. Great for attention-grabbing stops. |
| ease\_in\_out\_quad | Starts slow, speeds up, then slows down. Very natural. Ideal for most use cases. |
| ease\_in\_cubic | Slower start with more punchy acceleration. A bit more dramatic than quad. |
| ease\_out\_cubic | Strong start, smooth slow-down. Nice for relaxing endings. |
| ease\_in\_out\_cubic | Smooth acceleration and deceleration. Balanced and elegant. |
| ease\_in\_quart | Very slow start, then rapid. Great if you want dramatic build-up. |
| ease\_out\_quart | Fast start, very soft landing. Feels like gliding in. |
| ease\_in\_out\_quart | Cinema-style. High control with graceful motion. |
| ease\_in\_quint | Extremely slow start and rapid acceleration. For stylized scrolls. |
| ease\_out\_quint | Fast drop, featherlight finish. Perfect for premium UIs. |
| ease\_in\_out\_quint | Ultra-smooth and polished - high-end product demo feel. |
Need help? Contact us at [support@screenshotmax.com](mailto:support@screenshotmax.com)
# API Domains
Source: https://docs.screenshotmax.com/guides/start/api-domains
Understand the regional API domains available for ScreenshotMAX.
ScreenshotMAX exposes multiple API domains to keep your integrations fast regardless of where your infrastructure lives. Each domain serves the exact same product features and enforces the same usage quotas—the only difference is the physical location of the servers that handle your requests.
## Available domains
| Domain | Region | Location |
| -------------------------- | ----------------------- | -------- |
| `api.screenshotmax.com` | North America (default) | USA |
| `api-us.screenshotmax.com` | North America | USA |
| `api-eu.screenshotmax.com` | Europe | Belgium |
| `api-as.screenshotmax.com` | Asia | Taiwan |
* **`api.screenshotmax.com`** automatically routes to the North America (USA) region. It is ideal if your workloads are already based in North America or you do not need a specific regional endpoint.
* **`api-us.screenshotmax.com`** explicitly targets the **North America** region and is equivalent to the default `api` domain.
* **`api-eu.screenshotmax.com`** keeps traffic inside the **European Union** with infrastructure located in Belgium.
* **`api-as.screenshotmax.com`** serves the **Asia-Pacific region** from data centers in Taiwan.
## Choose the closest domain
For the lowest possible latency, pick the subdomain that is geographically closest to the systems making requests to the ScreenshotMAX API. This minimises the physical distance your network packets must travel and helps deliver faster response times.
No matter which domain you select, you will benefit from:
* Identical API surface and capabilities.
* The same authentication, rate limits, and quota accounting.
* Consistent behaviour, responses, and SLAs.
If you need to switch regions in the future, simply update the base URL used by your integration—no other code changes are required.
# Async and Webhooks
Source: https://docs.screenshotmax.com/guides/start/async-webhooks
For long-running or high-volume tasks, you can choose to receive the result asynchronously via a webhook.
# Sending a Webhook
## How It Works
Instead of waiting for the result in the API response, you can provide a webhook\_url in your request. Once the rendering is complete, we will send a POST request to that URL with the result.
Your `webhook_url` must:
* Be publicly accessible over HTTPS or HTTP
* Accept POST requests
* Return a 2xx HTTP status code to acknowledge the event
## Request Parameters
| Parameter | Type | Description |
| ---------------- | ------ | -------------------------------------------------------------------- |
| `webhook_url` | string | The URL to which the webhook will be sent. |
| `webhook_signed` | bool | If true, the webhook payload will be signed using your `secret_key`. |
### Webhook Signature (Optional but recommended)
If `webhook_signed` is set to true, we include a signature in the webhook request header:
```
X-Screenshotmax-WebHook-Signature: <sha256_hmac_signature>
```
This signature is generated using the HMAC SHA256 algorithm with your `secret_key` and the payload. You can verify the signature to ensure the request is from us.
### How to Verify the Signature
To verify the signature on your server:
1. Serialize the exact raw JSON body of the request.
2. Compute the HMAC SHA-256 hash using your `secret_key`.
3. Compare your computed hash with the value in the `X-Screenshotmax-WebHook-Signature` header.
<Warning>Be sure to use the raw body (as a string) before any parsing.</Warning>
## Webhook Payload
```json theme={null}
{
"id": "id-of-request",
"file": "https://cache.screenshotmax.com/<hash>.<ext>",
"expires": 1722625200,
"created": 1716898800
}
```
| Field | Type | Description |
| --------- | ------ | -------------------------------------------------------- |
| `id` | string | The unique identifier for the request. |
| `file` | string | The URL to the generated file. |
| `expires` | number | The timestamp (in seconds) when the file will expire. |
| `created` | number | The timestamp (in seconds) when the request was created. |
**Example API Request**
```json theme={null}
POST https://api.screenshotmax.com/v1/screenshot
{
"url": "https://example.com",
"access_key": "YOUR_ACCESS_KEY",
"webhook_url": "https://yourserver.com/webhook-handler",
"webhook_signed": true
}
```
### Tips for Testing
* Use [Webhook.site](https://webhook.site) to inspect incoming payloads
* Use [ngrok](https://ngrok.com/) to expose local endpoints for testing
# Async Request
If you don’t want to wait for the rendering result immediately in the response, you can process the request in **asynchronous mode** by setting the `async` parameter to true.
## What Happens in Async Mode?
When you set `async` to true in your request:
* The API **immediately responds with a 202 Accepted**.
* The rendering job is queued and processed in the background.
Once complete, the result is:
* Visible in your dashboard under the [Requests section](https://app.screenshotmax.com/requests).
* Optionally delivered to your `webhook_url`, if provided.
## How to Use
Add the `async` parameter to your request (either GET or POST):
**POST Example**
```json theme={null}
POST https://api.screenshotmax.com/v1/screenshot
{
"url": "https://example.com",
"access_key": "YOUR_ACCESS_KEY",
"async": true
}
```
**GET Example**
```
GET https://api.screenshotmax.com/v1/screenshot?url=https://example.com&access_key=YOUR_ACCESS_KEY&async=true
```
## API Response
When you set `async` to true, the API will respond with a 202 Accepted status code. The response will look like this:
```json theme={null}
{
"status": "Accepted",
"message": "The request has been accepted for processing",
"created": 1744030537
}
```
## Tracking the Result
After submission, the job will appear in your Requests dashboard. You can:
* View status (done, failed)
* Download the result once complete
If you included a `webhook_url`, you will also receive the result automatically once ready
Need help? Contact us at [support@screenshotmax.com](mailto:support@screenshotmax.com)
# Authentication
Source: https://docs.screenshotmax.com/guides/start/authentication
Learn how to authenticate your requests to the ScreenshotMAX API using your unique API access key. This guide covers the authentication process for both GET and POST requests, ensuring secure and efficient access to our services.
To use our API, you’ll need an `access_key`. This key is **unique to your account** and is required for **all API requests.**
## What is the Access Key?
The `access_key` identifies and authenticates your requests. Think of it as your personal API password. Without it, the API will reject your requests.
<Warning>Never share your access key publicly or commit it to version control.</Warning>
## How to use the Access Key
You can authenticate your requests in one of the following ways:
### 1. In the Header (Recommended)
Add the access key to the `X-Access-Key` HTTP header. This method is secure and works with **all HTTP methods.**
```json theme={null}
X-Access-Key: YOUR_ACCESS_KEY
```
### 2. In the Query String (GET requests only)
For GET requests, you can include the key as a query parameter:
```
GET https://api.screenshotmax.com/v1/screenshot?access_key=YOUR_ACCESS_KEY&url=https://example.com
```
This is useful for quick testing or browser-based usage.
### 3. In the JSON Body (POST requests only)
For POST requests, you can also include the key in the request body:
```json theme={null}
{
"access_key": "YOUR_ACCESS_KEY",
"url": "https://example.com"
}
```
### Example Requests
Example using curl (Header)
```bash theme={null}
curl -X GET https://api.screenshotmax.com/v1/screenshot \
-H "X-Access-Key: YOUR_ACCESS_KEY" \
-G --data-urlencode "url=https://example.com"
```
Example using fetch (POST)
```js theme={null}
fetch("https://api.screenshotmax.com/v1/pdf", {
method: "POST",
headers: {
"Content-Type": "application/json",
"X-Access-Key": "YOUR_ACCESS_KEY"
},
body: JSON.stringify({
url: "https://example.com"
})
});
```
## Rotating Your Access Key
You can regenerate (rotate) your access key at any time from your [dashboard](https://app.screenshotmax.com/access).
When you rotate your key:
* A **new access key** is generated immediately.
* Your **old key becomes invalid** and cannot be used anymore.
<Warning>Be sure to update your access key in all scripts and environments after rotation.</Warning>
### What happens if the access key is missing or invalid?
If your request doesn’t include a valid `access_key`, you’ll receive a status 401 and a response like this:
```json theme={null}
{
"statusCode": 401,
"error": "Unauthorized",
"message": "Invalid access key"
}
```
This means your request was rejected due to authentication failure. Double-check your access key and try again.
Need help? Contact us at [support@screenshotmax.com](mailto:support@screenshotmax.com)
# GPU Rendering
Source: https://docs.screenshotmax.com/guides/start/gpu-rendering
Enable lightning-fast and high-fidelity rendering using GPU acceleration.
## What is GPU Rendering?
GPU rendering leverages hardware acceleration to generate screenshots and PDFs more efficiently, especially for complex or animated content. This feature is ideal for:
* Heavy web animations
* WebGL / 3D visualizations
* Video rendering previews
* Graphically rich UIs
## Plan Requirement
<Warning>GPU rendering is only available to users on the **Scale plan**.</Warning>
If you’re on the Free, Basic or Growth plans, enabling `gpu_rendering` will return the status 423 and an error:
```json theme={null}
{
"statusCode": 423,
"error": "Locked",
"message": "No quota. Please subscribe to a paid plan with gpu rendering capabilities"
}
```
You can upgrade your plan anytime from the Subscribe section of your [dashboard](https://app.screenshotmax.com/subscribe/monthly).
## How to Enable GPU Rendering
To activate GPU rendering, simply set the `gpu_rendering` option to true in your API request.
Example (POST request)
```json theme={null}
{
"url": "https://example.com",
"access_key": "YOUR_ACCESS_KEY",
"gpu_rendering": true
}
```
Example (GET request)
```
GET https://api.screenshotmax.com/v1/screenshot
?url=https://example.com
&access_key=YOUR_ACCESS_KEY
&gpu_rendering=true
```
The `gpu_rendering` flag is optional and defaults to false.
### Need Help?
If you’re unsure whether you need GPU rendering or how to upgrade your plan, contact us at [support@screenshotmax.com](mailto:support@screenshotmax.com)
# Introduction
Source: https://docs.screenshotmax.com/guides/start/introduction
Welcome to the ScreenshotMAX API. This guide will help you quickly integrate our API into your project. Whether you need to capture screenshots, record animated screenshots, generate PDFs, or scrape webpage content, our API offers a simple and flexible solution using both GET and POST requests.
## Prerequisites
Before you begin, ensure you have:
* **API Access Key:** Obtain your unique access key by signing up on our platform.
* **Basic HTTP & JSON Knowledge:** Familiarity with making HTTP requests and handling JSON data.
* **Development Environment:** Any environment capable of sending HTTP requests (e.g., cURL, Postman, or your preferred programming language).
## API Endpoints
Our API provides four primary endpoints. Each endpoint supports both GET and POST methods:
<CardGroup cols={2}>
<Card title="/screenshot" icon="aperture" iconType="duotone" href="/endpoints/get-screenshot">
Capture high-quality webpage screenshots
</Card>
<Card title="/screencast" icon="film" iconType="duotone" href="/endpoints/get-screencast">
Record animated screenshots of webpages.
</Card>
<Card title="/pdf" icon="file-pdf" iconType="duotone" href="/endpoints/get-pdf">
Generate PDFs from webpages.
</Card>
<Card title="/scrape" icon="file-import" iconType="duotone" href="/endpoints/get-scrape">
Scrape content from webpages.
</Card>
<Card title="/tasks" icon="timer" iconType="duotone" href="/endpoints/get-tasks">
Automate your actions.
</Card>
<Card title="/others" icon="gear-code" iconType="duotone" href="/endpoints/usage">
Usage and devices list.
</Card>
</CardGroup>
# IP Ranges
Source: https://docs.screenshotmax.com/guides/start/ip-ranges
List of IP ranges used by ScreenshotMAX API infrastructure.
To enable access from the **ScreenshotMAX API** to your infrastructure, please ensure your firewall allows traffic from the following IP addresses:
* **Google Cloud `us-central1` region IPs**.
Refer to the official [Google Cloud IP ranges](https://www.gstatic.com/ipranges/cloud.json) for the most up-to-date list.
If your setup requires additional configuration or you encounter issues, please contact us at [support@screenshotmax.com](mailto:support@screenshotmax.com) for assistance.
# Quickstart
Source: https://docs.screenshotmax.com/guides/start/quickstart
Making your first request
## GET Request Example
Use a GET request when you prefer to pass parameters via querystrings. For example, to capture a screenshot:
```
https://api.screenshotmax.com/v1/screenshot
?access_key=YOUR_ACCESS_KEY
&url=https://example.com
```
## POST Request Example
For POST requests, you send a JSON payload. Here’s an example for capturing an animated screenshot:
```json theme={null}
POST "https://api.screenshotmax.com/v1/screenshot"
{
"access_key": "YOUR_ACCESS_KEY",
"url": "https://example.com"
}
```
## Request Parameters Overview
All endpoints require the following basic parameters:
* **`access_key`** (string): Your unique API key. **(required)**
* **`url`** (string): The target webpage URL. **(required)**
Additional parameters allow you to customize your requests (e.g., viewport settings, delay, caching, and more).
For a full list of parameters and their constraints, please refer to our [API References](https://docs.screenshotmax.com/endpoints/get-screenshot).
## Handling API Responses
The API returns responses that include your captured media (screenshot, animated screenshot, PDF, or scraped content) along with relevant metadata (such as HTTP status, headers, and additional capture details).
# Scheduled Tasks
Source: https://docs.screenshotmax.com/guides/start/scheduled-tasks
Scheduled Tasks allow you to automatically trigger API calls at regular intervals, without any manual action. Perfect for automation, monitoring, and recurring data capture.
<Warning>
**Plan Requirement**
Scheduled Tasks are available only on the **Scale plan**.
Upgrade your account via the Subscription / Dashboard [section](https://app.screenshotmax.com/subscribe/monthly) to unlock this feature.
</Warning>
## Managing Scheduled Tasks
You can manage scheduled tasks directly from your [Dashboard](https://app.screenshotmax.com/scheduled-tasks):
* Create new tasks
* Edit existing ones
* Delete tasks
* Pause or resume individual tasks
## Configuration Parameters
| Field | Description |
| ----------- | --------------------------------------------------------------------------------------------------------------------------------- |
| Name | The name of the scheduled task. |
| Service | Which API to call: **screenshot, screencast, pdf, or scrape**. |
| Querystring | The query string to send with the API call (must be URL-encoded). |
| Frequency | How often the task runs: Every minute - Every hour - Every day - Every month - Custom: use standard cron syntax (\* \* \* \* \*). |
| Timezone | Choose the timezone in which the task will be scheduled. Default to UTC. |
| Enabled | Toggle to pause/resume the scheduled task without deleting it. |
<Note>
If your `access_key` is rotated, all scheduled tasks are automatically updated to use the new key.\
If your account has **signed request mode** enabled, each scheduled request will be automatically signed with your `secret_key`.
</Note>
### Frequency Options
* **Every minutes**: Runs every minute
* **Every hours**: Runs every hour
* **Every days**: Runs every day at the same time
* **Every months**: Runs every month on the same day
* **Custom**: Runs at a custom interval. You can specify the exact time and frequency using standard cron syntax. For example, `0 0 * * *` runs every day at midnight, while `*/5 * * * *` runs every 5 minutes.
Use [Unix Cron Format](https://crontab-generator.com/en).
### Timezone Options
Select the timezone in which the task will be scheduled. This is important for tasks that need to run at specific times, such as daily reports or hourly checks.
The value must correspond to the timezone abbreviation used in the [tz database](https://en.wikipedia.org/wiki/List_of_tz_database_time_zones). The default timezone is UTC.
## Under the Hood
Each scheduled task is equivalent to a standard API request. When it runs, it:
* Calls the corresponding API with your configured query parameters
* Triggers your webhook if one is set
* Appears in your Request Logs for tracking and debugging
## Example Use Cases
* Capture a daily screenshot of your homepage
* Run a scrape job every hour to monitor price changes
* Generate a PDF of a report every Monday at 6am
* Monitor the availability of a service in a specific timezone
Need help? Contact us at [support@screenshotmax.com](mailto:support@screenshotmax.com)
# Signed Requests
Source: https://docs.screenshotmax.com/guides/start/signed-requests
Generate signed requests for secure communication with ScreenshotMAX API
For additional security, you can authenticate GET requests using a **signed querystring**. This method ensures that the request has not been tampered with and comes from a trusted source.
<Warning>Signed requests are only supported for **GET requests.**</Warning>
## What is a Signed Request?
A signed request uses your **secret key** to generate a SHA-256 hash of the querystring. This hash is then included in the request as a signature parameter.
When our servers receive the request, they verify the signature using the same secret key.
## Your Secret Key
* Your `secret_key` is **unique to your account**.
* It is **only visible in your dashboard**.
* **Never share your secret key publicly**.
* You can **rotate your secret key** at any time via the dashboard.
<Warning>If your secret key is exposed or compromised, rotate it immediately.</Warning>
## Enforce Signed GET Requests
From your dashboard, you can enforce signature validation for all GET requests by enabling the option:
**“Accept only signed requests”**
Once enabled:
* Any unsigned GET request will be rejected.
* This setting does **not** affect POST or other non-GET requests.
* You can toggle this option from the Access Control Management section in your [dashboard](https://app.screenshotmax.com/access).
## How to Sign a Request
### 1. Start with your full querystring (everything after the ?)
Example of querystring:
```
url=https://example.com&access_key=YOUR_ACCESS_KEY
```
### 2. Do not include the signature parameter (yet)!
### 3. Compute the SHA-256 HMAC of the querystring using your `secret_key`
Node.js Example
```js theme={null}
const crypto = require("crypto");
const queryString = "url=https://example.com&access_key=YOUR_ACCESS_KEY";
const secretKey = "YOUR_SECRET_KEY";
const signature = crypto
.createHmac("sha256", secretKey)
.update(queryString)
.digest("hex");
console.log(signature);
```
Python Example
```python theme={null}
import hmac
import hashlib
query_string = "url=https://example.com&access_key=YOUR_ACCESS_KEY"
secret_key = b"YOUR_SECRET_KEY" # must be bytes
signature = hmac.new(secret_key, query_string.encode("utf-8"), hashlib.sha256).hexdigest()
print(signature)
```
### 4. Add the signature parameter to your final querystring
```
?url=https://example.com&access_key=YOUR_ACCESS_KEY&signature=computed_signature
```
## Rotating the Secret Key
Just like the `access_key`, you can rotate your `secret_key` from your dashboard.
After rotation:
* A new secret key will be generated.
* The old one will become invalid.
* Make sure to update all your signing logic with the new key.
Example (Full URL)
```
GET https://api.screenshotmax.com/v1/screenshot
?url=https://example.com
&access_key=YOUR_ACCESS_KEY
&signature=2f3a5c9d...
```
<Warning>
#### Important Notes
* The **order** of query parameters must be **preserved** exactly when generating the signature.
* **Do not include the signature parameter itself** in the string you hash.
* Only use this method for **GET** requests. It is not supported for POST or other methods.
</Warning>
## Test Your Signature
We recommend verifying your implementation in a development environment before going live.
## Why Use Signed Requests?
Signed requests add an extra layer of protection, ensuring:
* The request hasn’t been modified in transit.
* The request originates from a trusted client with access to the secret key.
* You can optionally enforce this behavior for all GET calls to your API.
Need help? Contact us at [support@screenshotmax.com](mailto:support@screenshotmax.com)
# null
Source: https://docs.screenshotmax.com/guides/tutorials/captchas
# null
Source: https://docs.screenshotmax.com/guides/tutorials/performance
# null
Source: https://docs.screenshotmax.com/guides/tutorials/proxies
| |